Video Transcript
\n[0:00] Welcome Coffee Enthusiast. Today, let's master the art of using the three-in-one powder filter with your InstaCurper Espresso Coffee Maker. For a single aromatic cup of espresso, attach the one cup filter by turning it clockwise, add one scoop of your favourite fresh ground coffee to the filter. Tant the coffee grounds firmly, creating a perfect base for your espresso. Now, lock the filter by turning it anticlockwise, securing the grounds in place.
\n[0:30] Ready for the magic? Press the one cup button and watch as a single shot of espresso, ground with cream or fills your cup. For a bolder experience with a double shot, attach the two-cup filter to the pota filter. Add two generous scoops of coffee grounds, next, it's time to tamper the coffee grounds. This step is crucial for optimal water extraction while brewing.
\n[1:00] Lock the pota filter and press the two-cup button to start brewing. Behold, as two shots of espresso with velvety cream or fills your cup. To switch things up with easy-serve espresso pods, attach the one-cup filter. Insert your favourite easy-serve espresso pod into the filter for a hassle-free experience.
\n[1:30] Lock the pota filter securely and press one cup to brew. Watch as the rich aromatic coffee quarters your easy-serve espresso pods fill your favourite mug. You have mastered the versatile 3-in-1 pota filter with your insta-cupper espresso coffee maker. Enjoy your perfect cup every day. Brew it simple, brew it with insta-cupper.
\nVideo Transcript
\n[0:00] Welcome to your step-by-step guide on how to brew the perfect espresso with your InstaCapa ExpressoMaker. First step by filling the water tank to its maximum capacity. Next, press the power button to turn on your InstaCapa ExpressoMaker. Now, attach the One Cup filter to the Porta filter by turning it clockwise. Add one scoop of your favorite ground coffee to the filter.
\n[0:30] Make sure to distribute the coffee evenly for a perfect glue. Tamp the coffee firmly to ensure a rich and full-bodied espresso. Now, attach the Porta filter to the espresso maker by locking it anticlockwise. For a single espresso, simply press the One Cup button. For a double espresso, attach the Two Cup filter InstaCapa.
\n[1:00] Add two scoops of ground coffee. Remember to tap the coffee firmly once again. Lock the Porta filter in place. Press the Two Cup button for a double espresso. And there you have it.
\n[1:30] With the InstaCapa ExpressoMaker, brewing the perfect espresso has never been easier. A delicious espresso with the perfect cream, all from the comfort of your own home. So, what are you waiting for? Get your InstaCapa ExpressoMaker today and start enjoying Barista Quality espresso at home.
\nVideo Transcript
\n[0:00] Welcome to the complete user guide to InstaKappa espresso brewing and milk steaming. Begin by pressing the power button to turn on your InstaKappa espresso maker. As you press the power button, the InstaKappa espresso maker comes to life. Initiating a 30 second preheating phase. This crucial step ensures that your coffee is brewed at an optimal temperature, unlocking the full flavored potential of your coffee grounds. Keep an eye on the indicated light. Once it stops flashing, it's perfect time to start brewing your espresso.
\n[0:30] For steaming, press the steam button to prepare the machine to reach the optimal temperature. Keep an eye on the steaming light and patiently wait until it stops flashing. Once it stops flashing, position your milk jar and insert the steaming wand after 2 cm inside the milk. Turn the knob up to steaming icon to froth your milk. Once you get the perfect froth for your latte or cappuccino, turn off the knob.
\n[1:00] You'll notice that the 1 cup and 2 cup buttons become inactive after steaming. To unlock and start brewing again, simply tap the steam button. There you have it. Enjoy your perfect cup.
\n[1:30] Brew it right, brew it with InstaKappa.
\n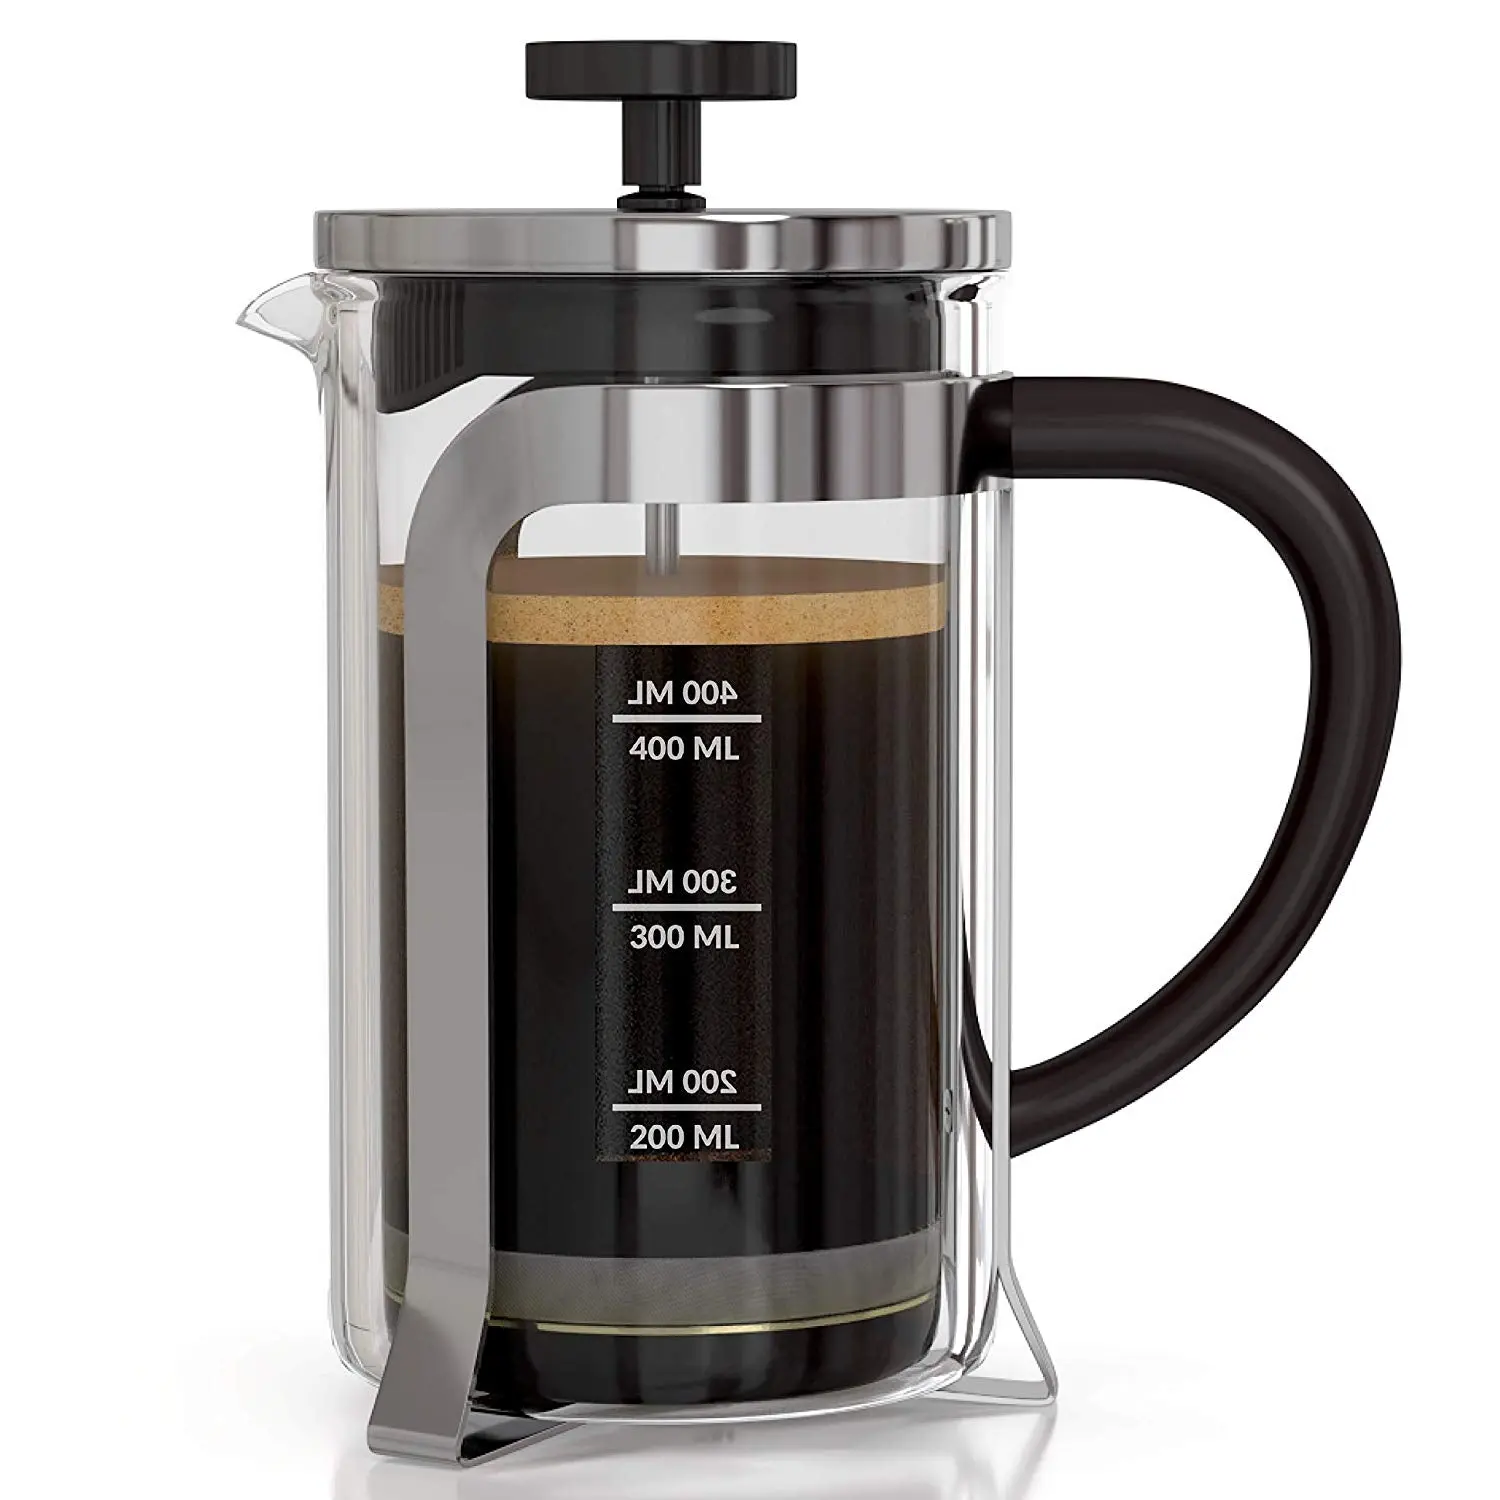
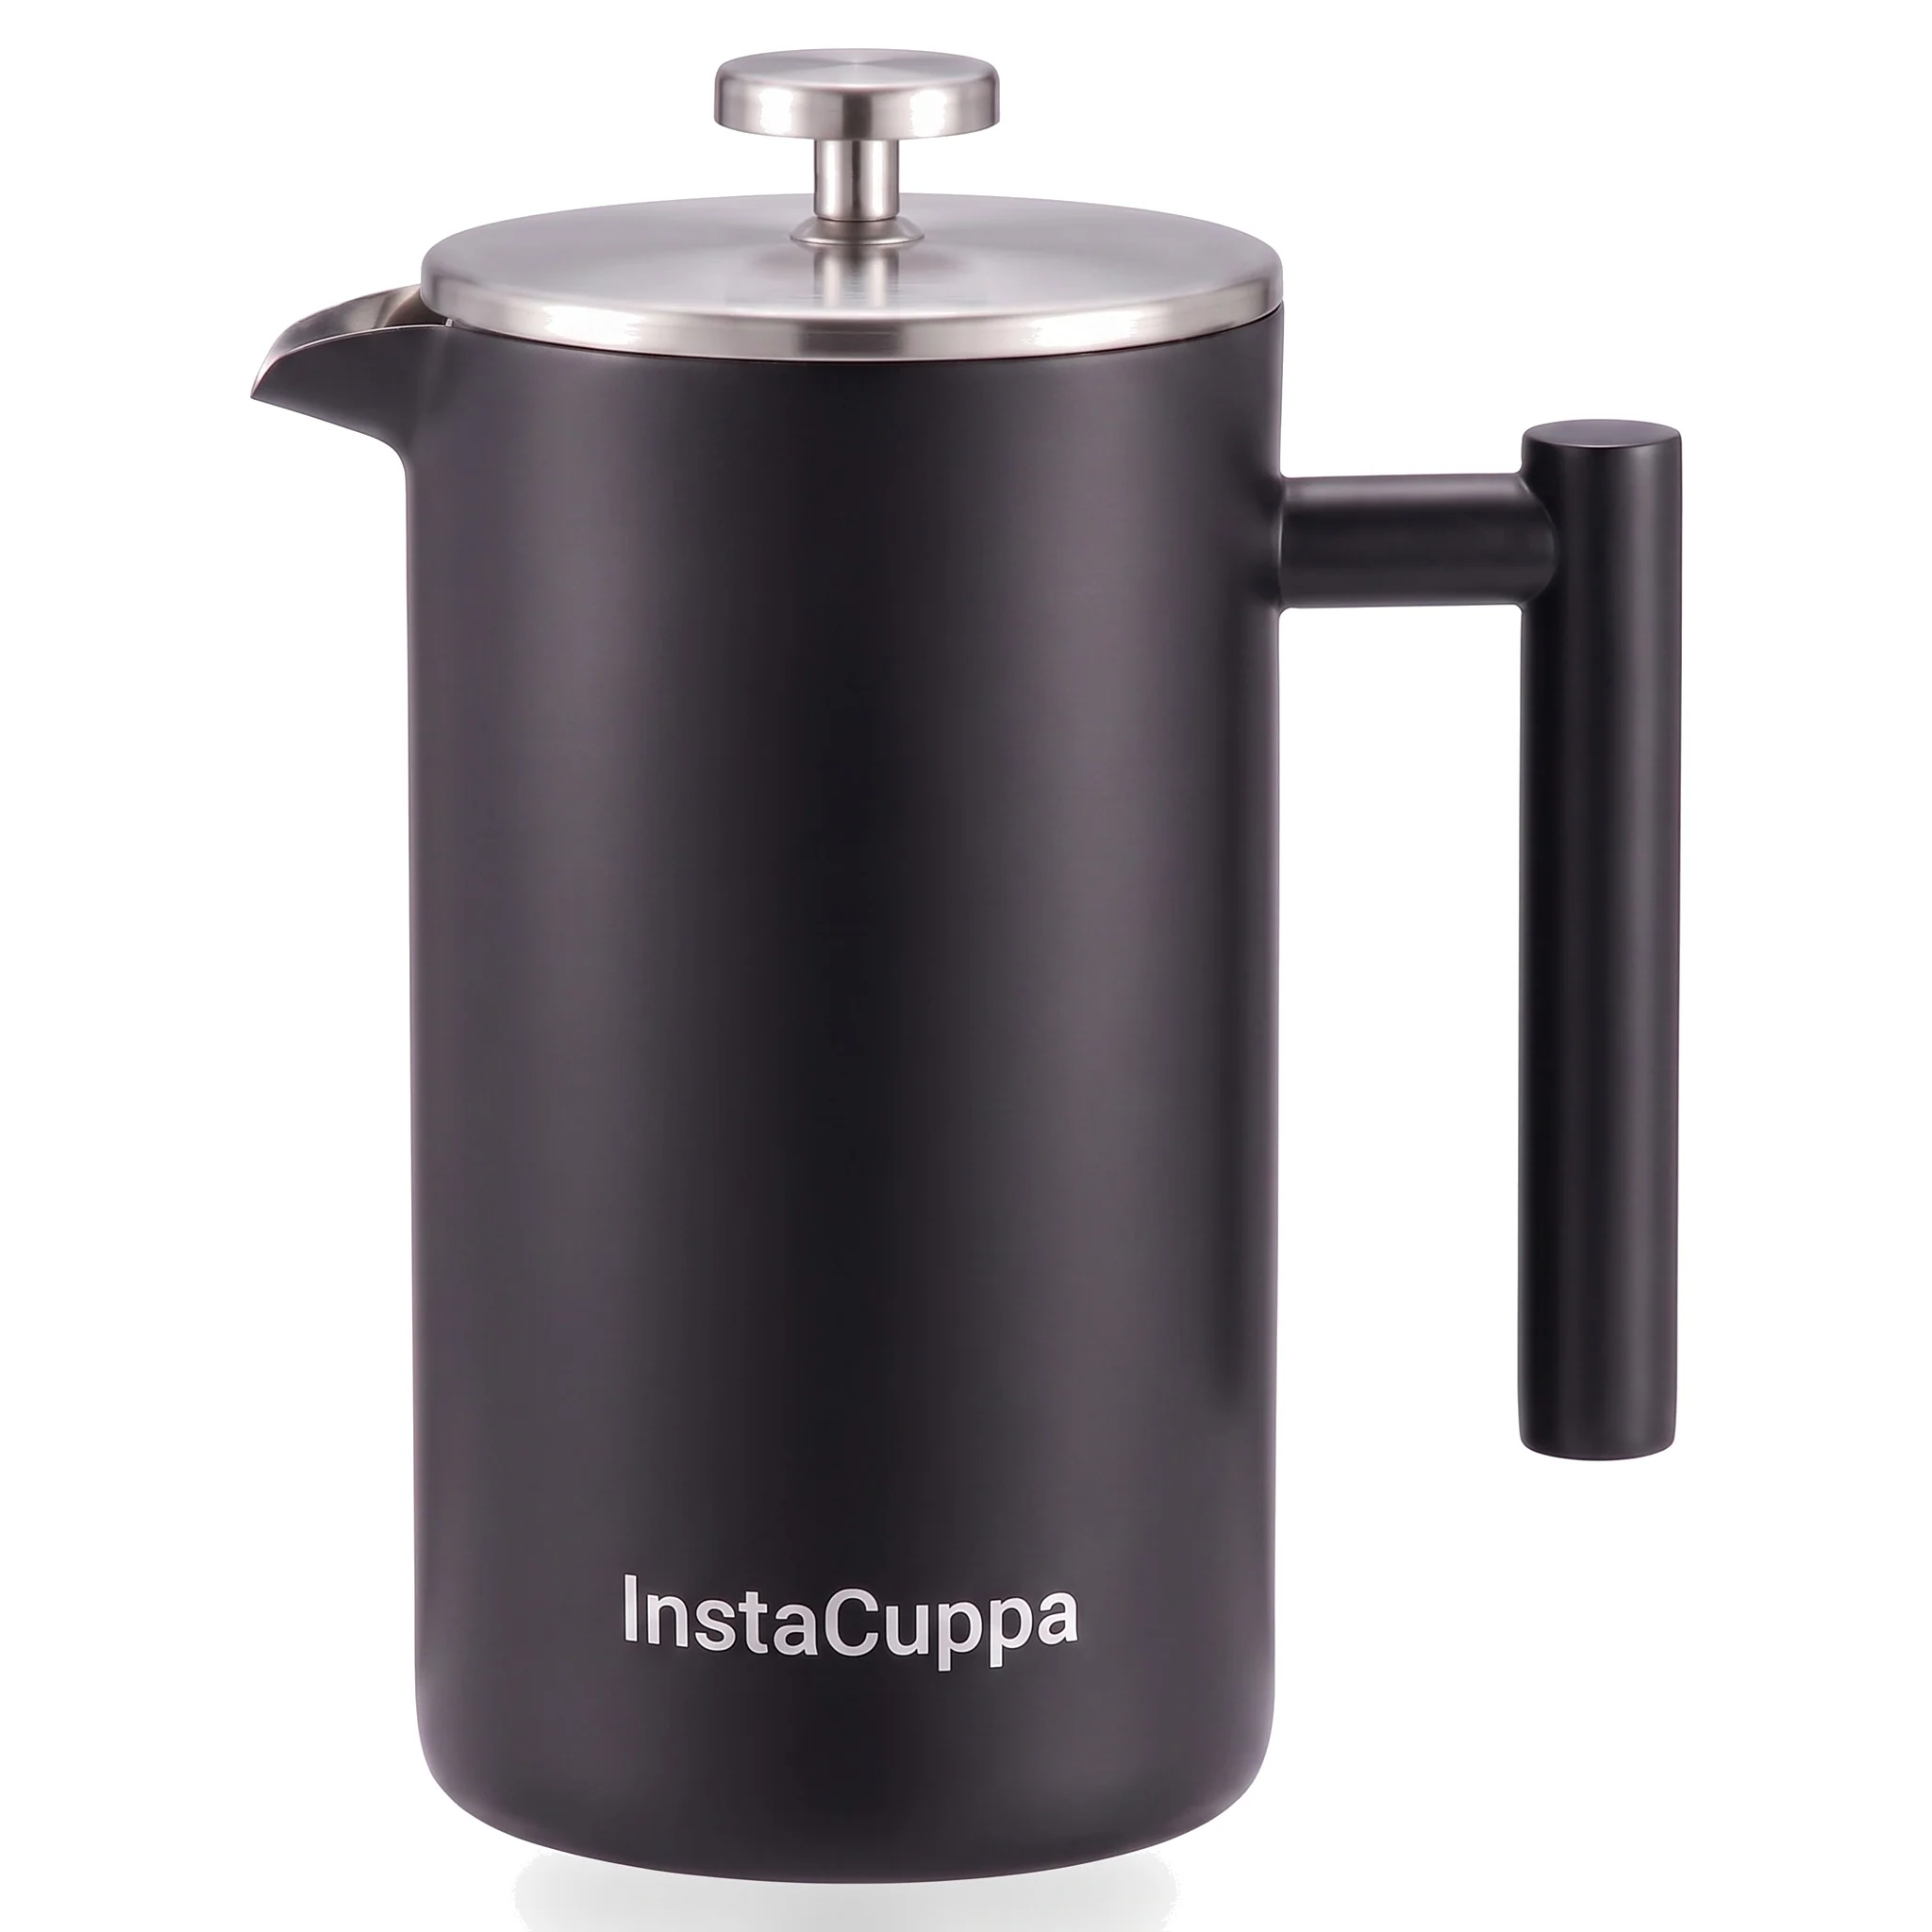
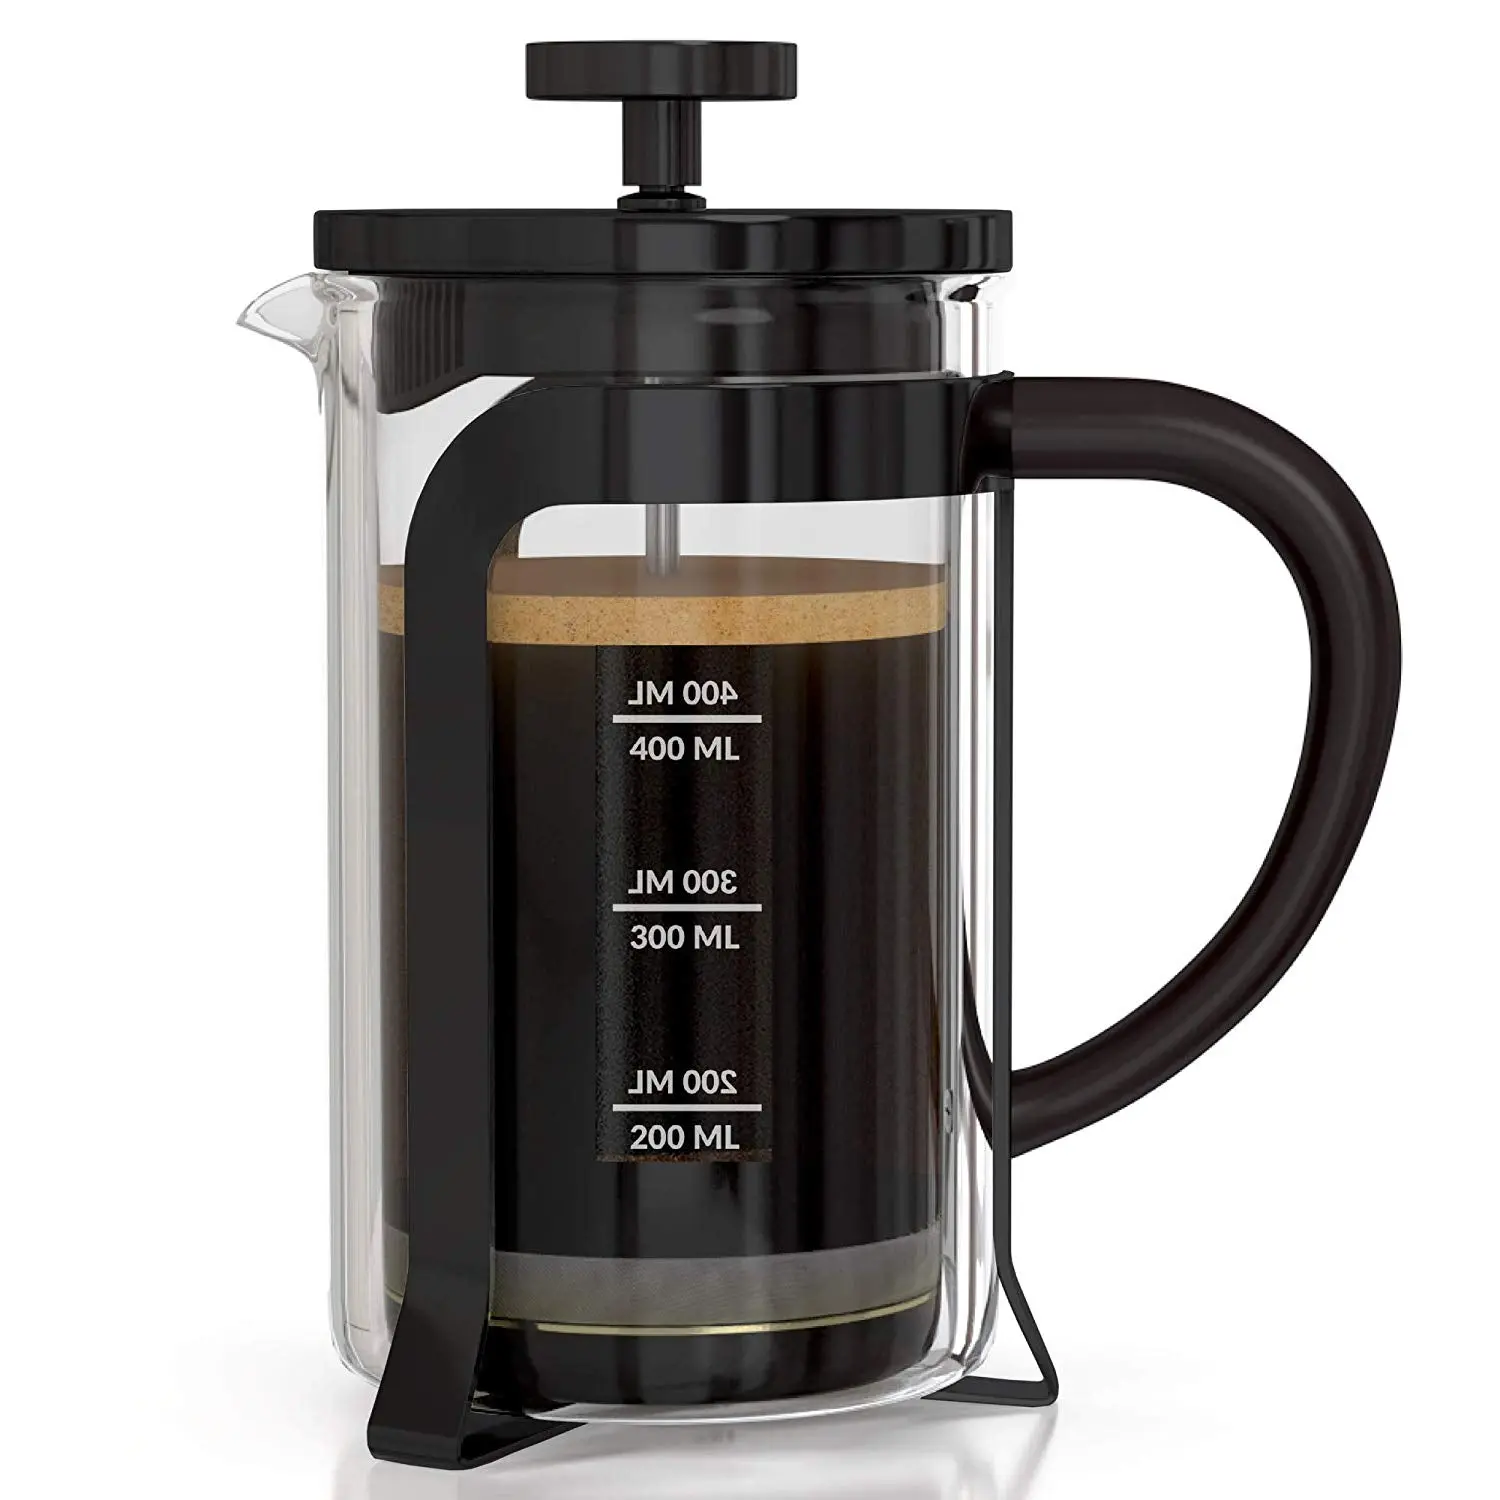
InstaCuppa French Press Coffee Maker with Smooth Plunger Mechanism, 4 Part Filtration, Measurement Markings
InstaCuppa French Press Coffee Maker with Smooth Plunger Mechanism, 4 Part Filtration, Measurement Markings
Drink Your Coffee In Style And Be A Trendsetter!

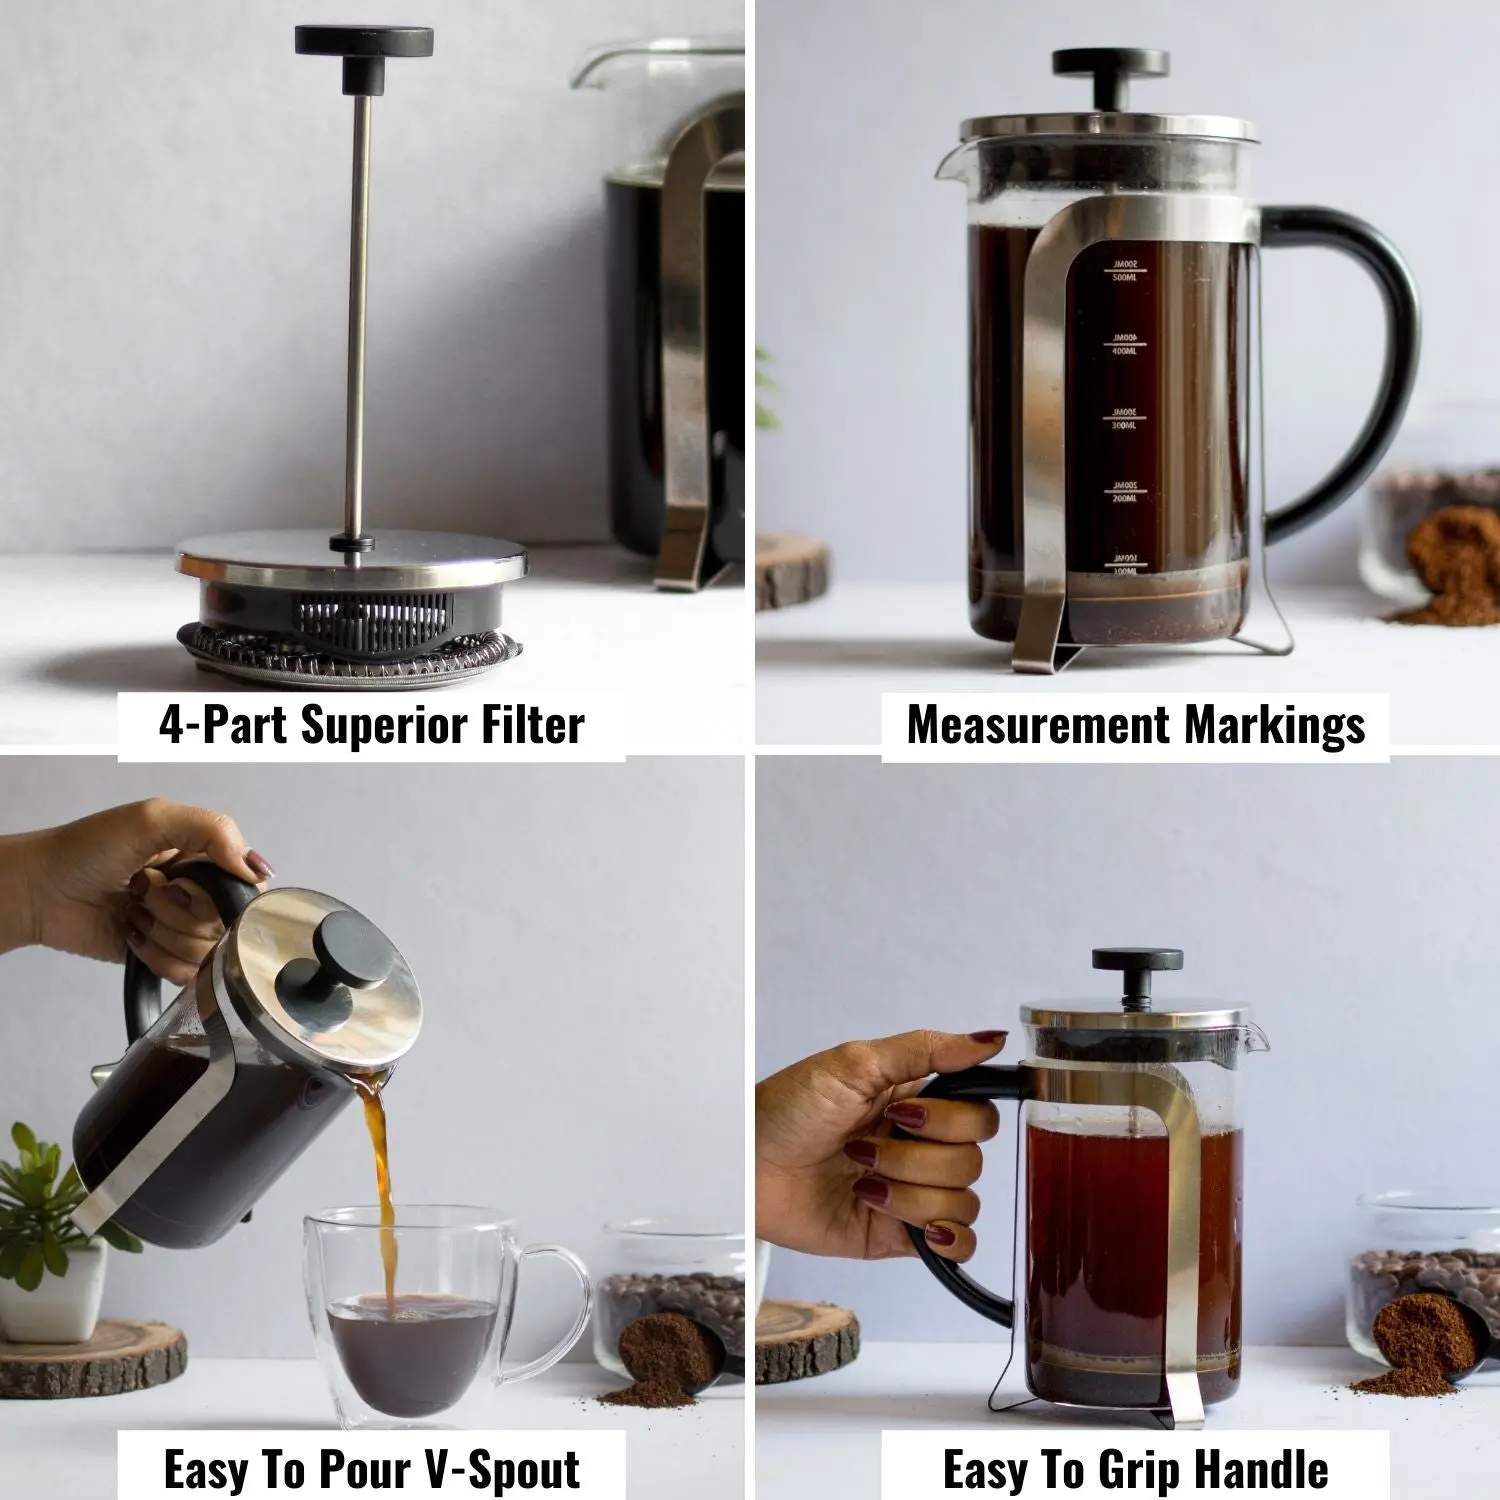
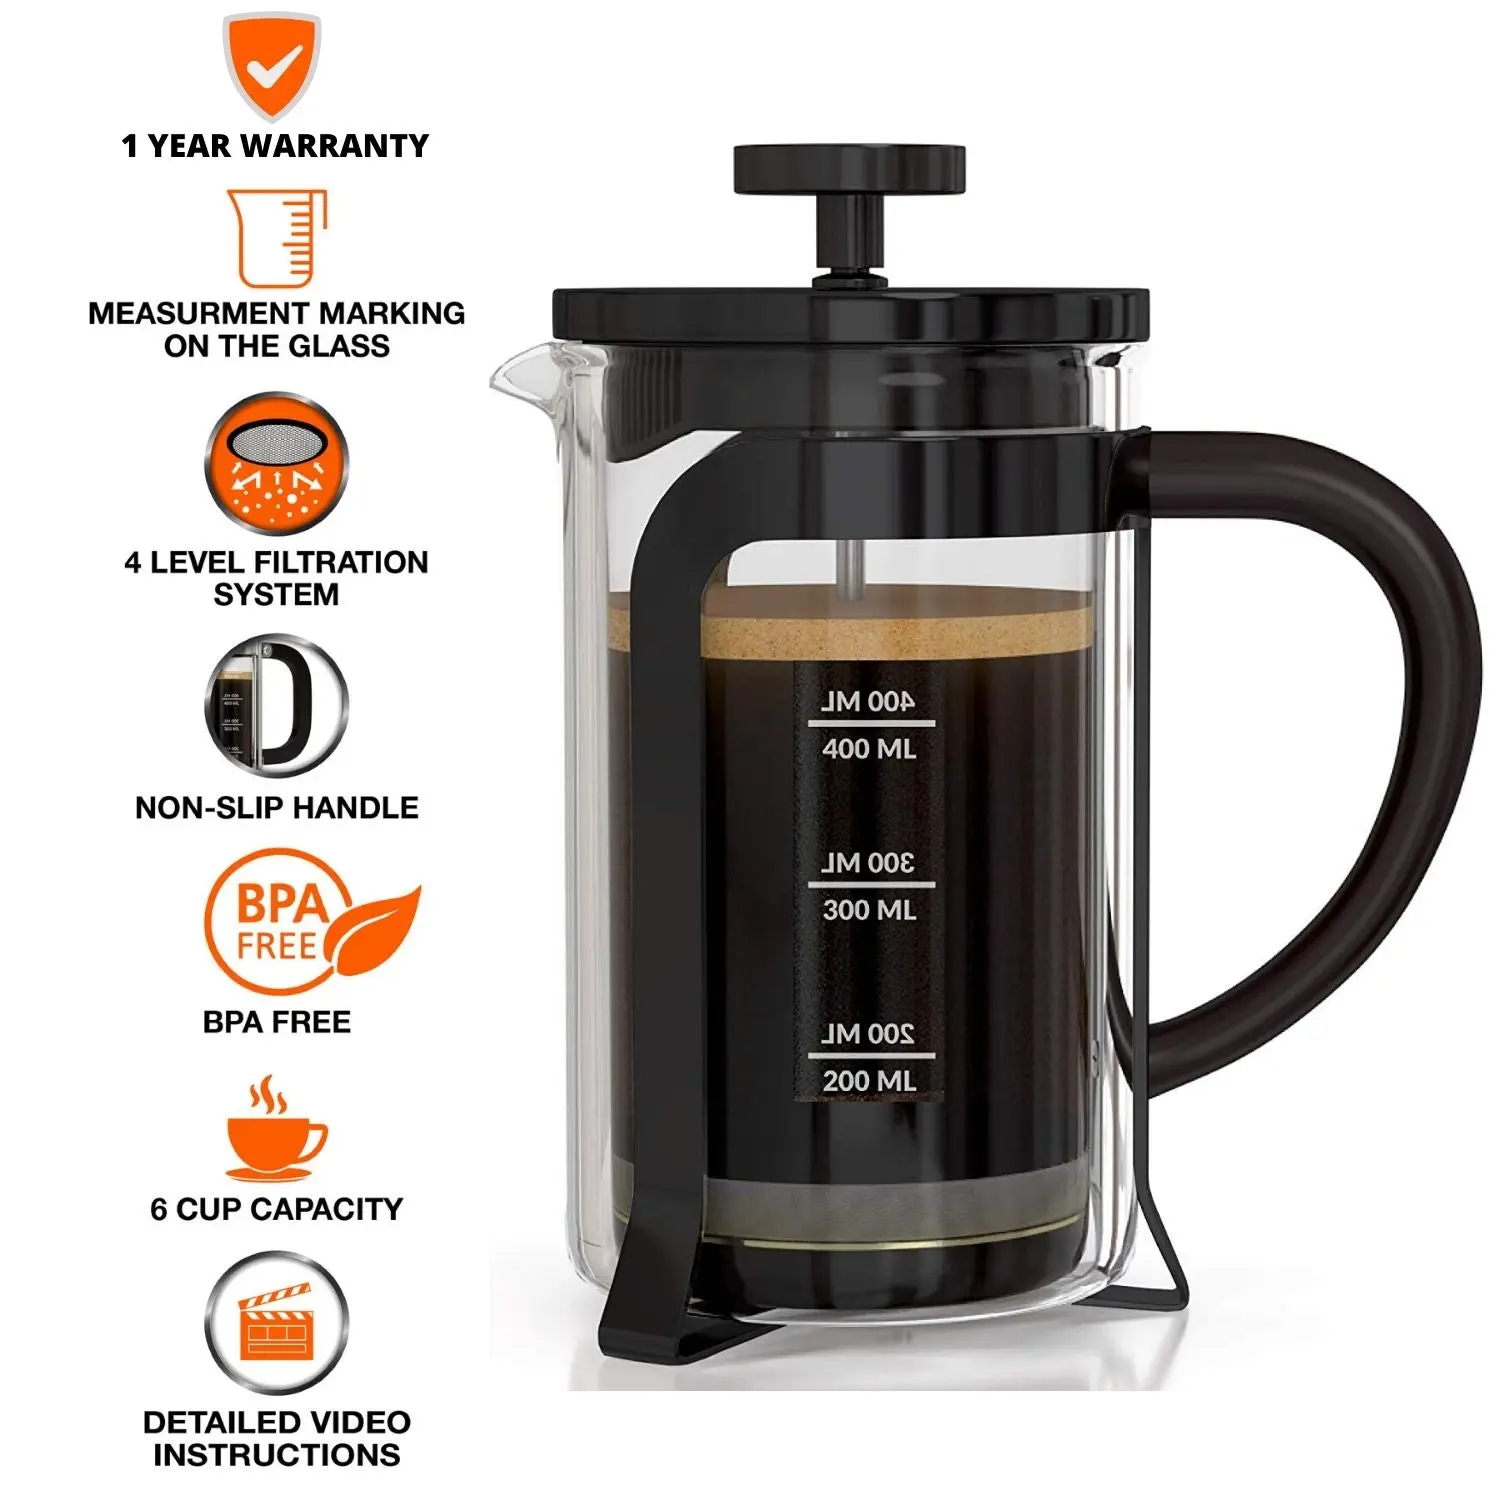
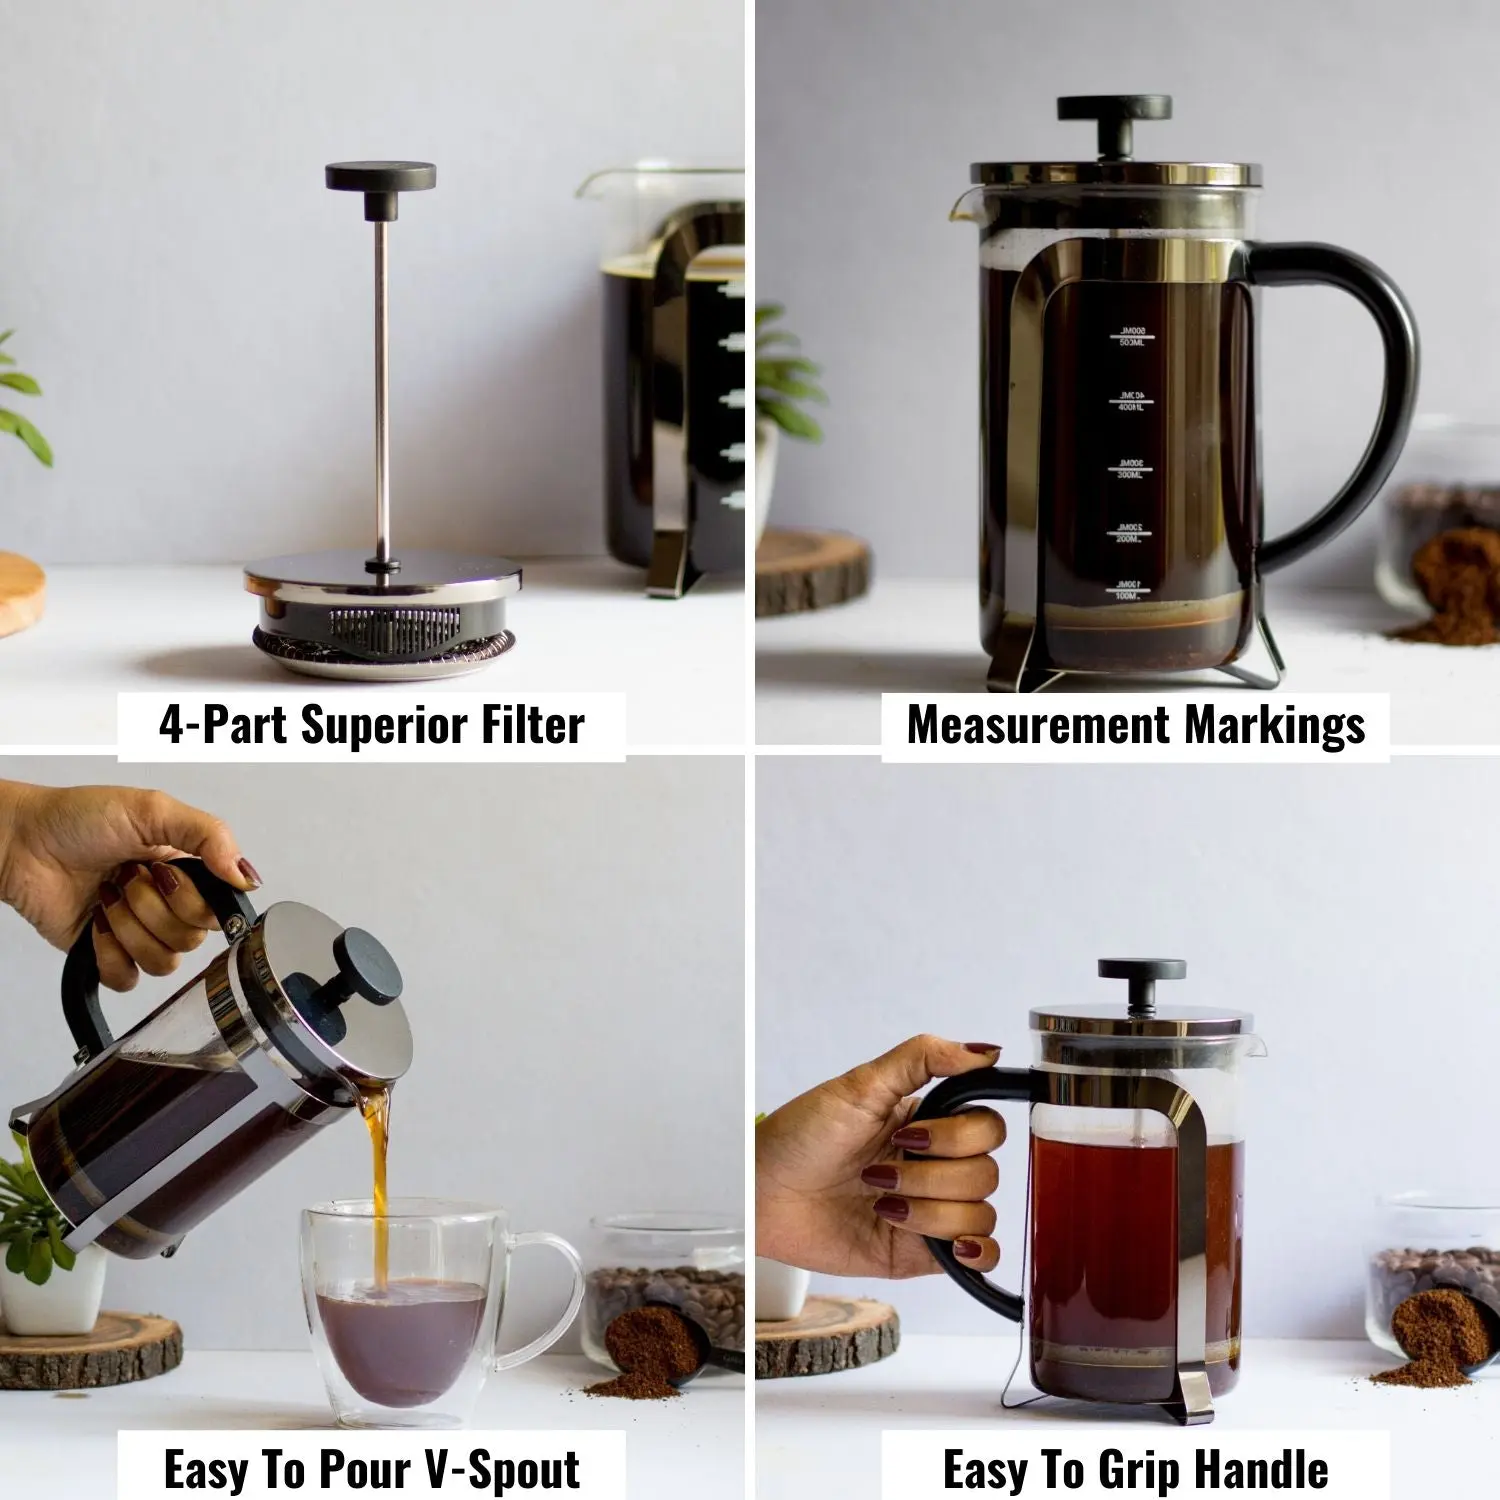
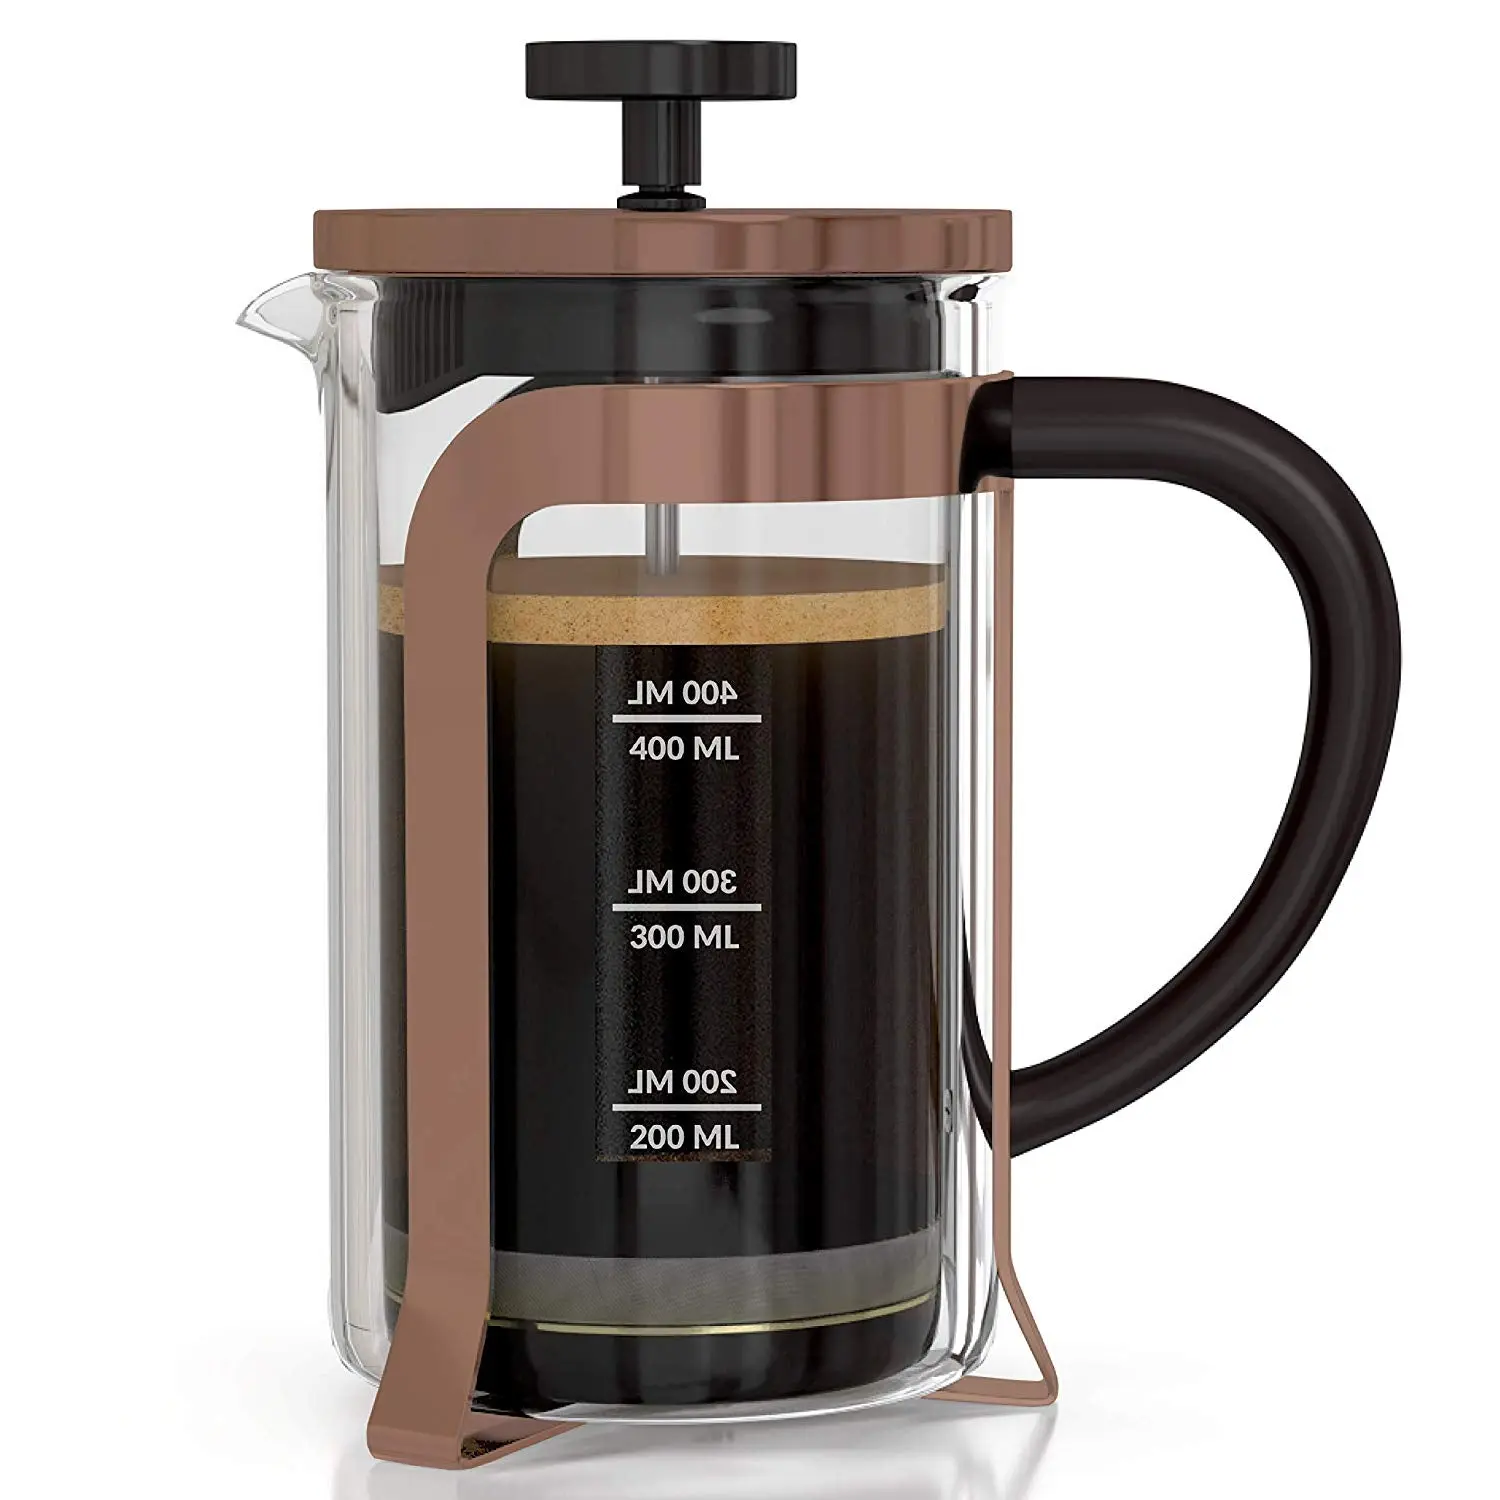
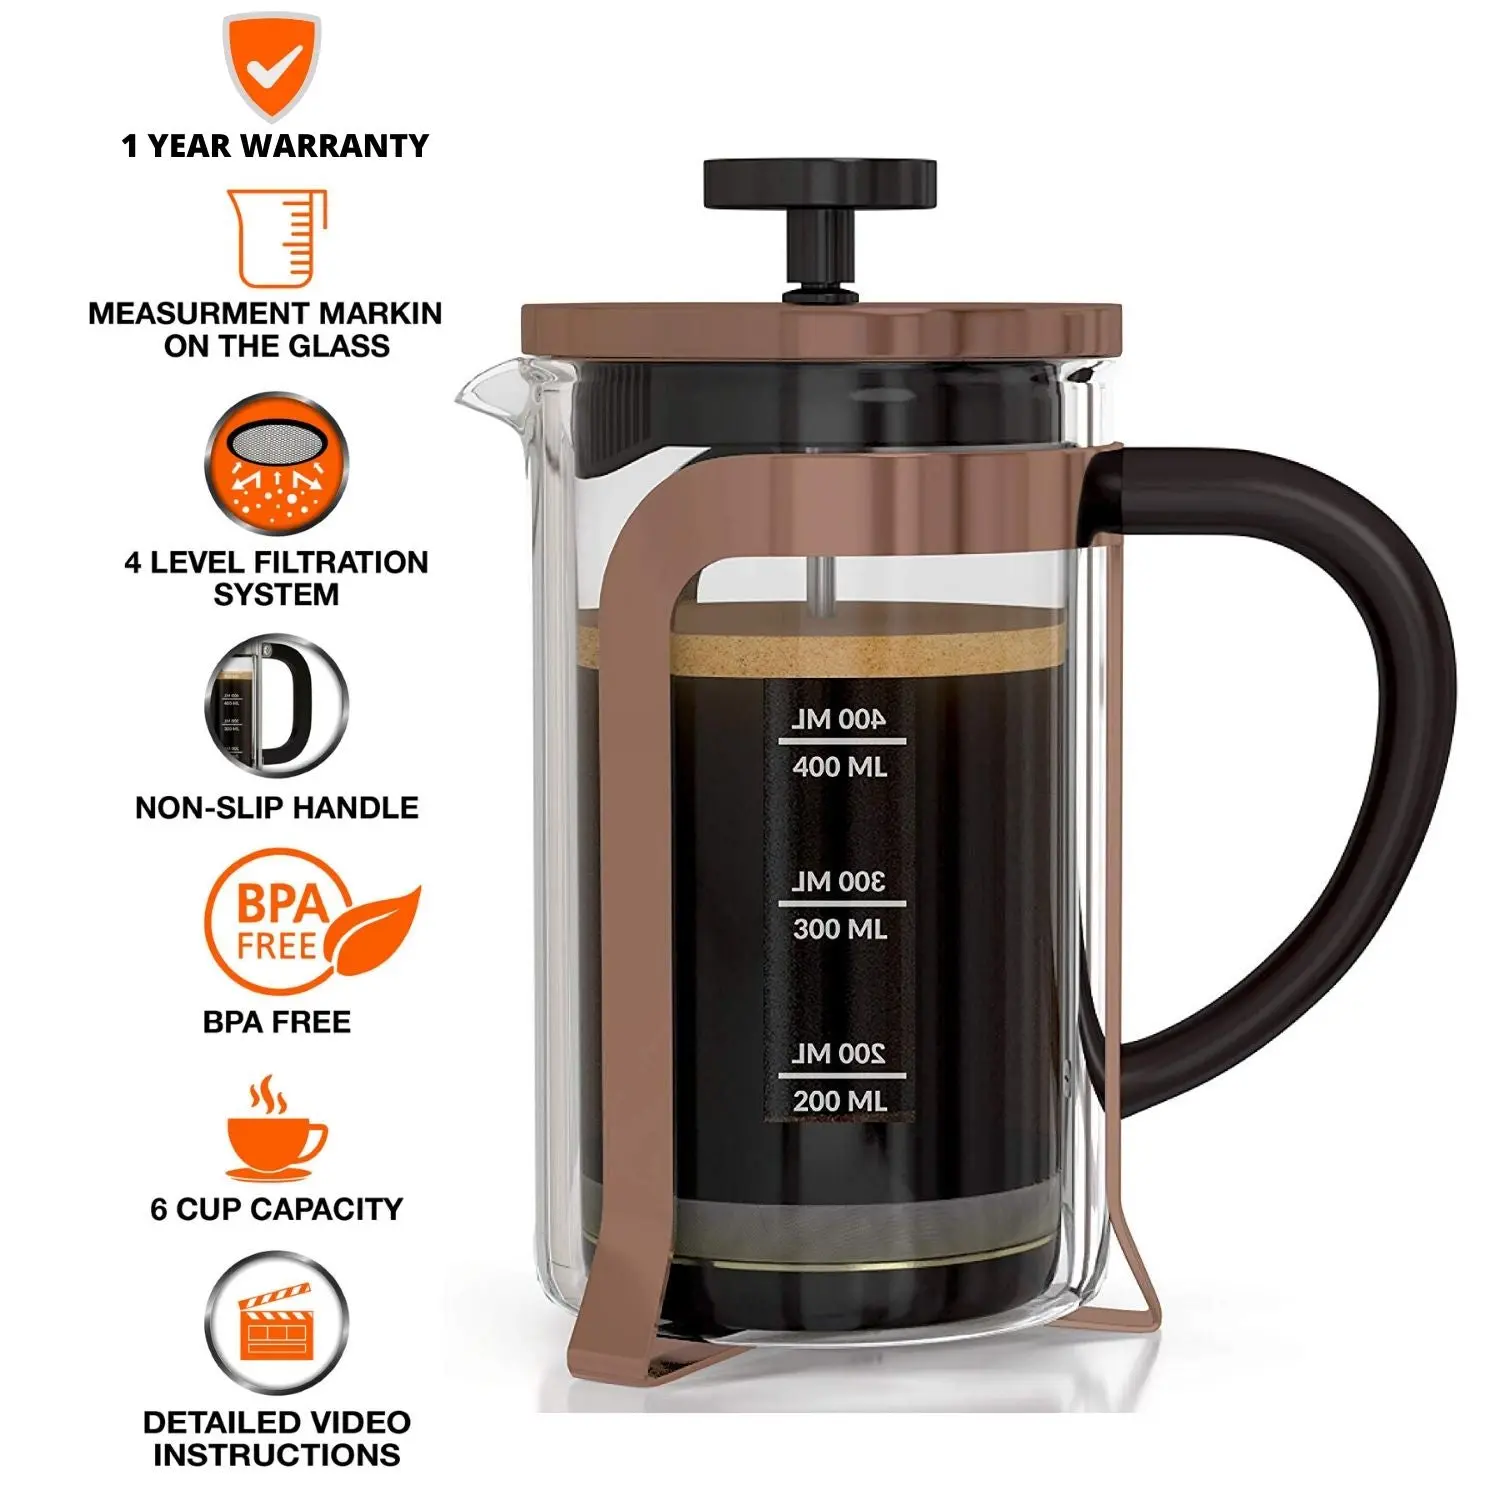
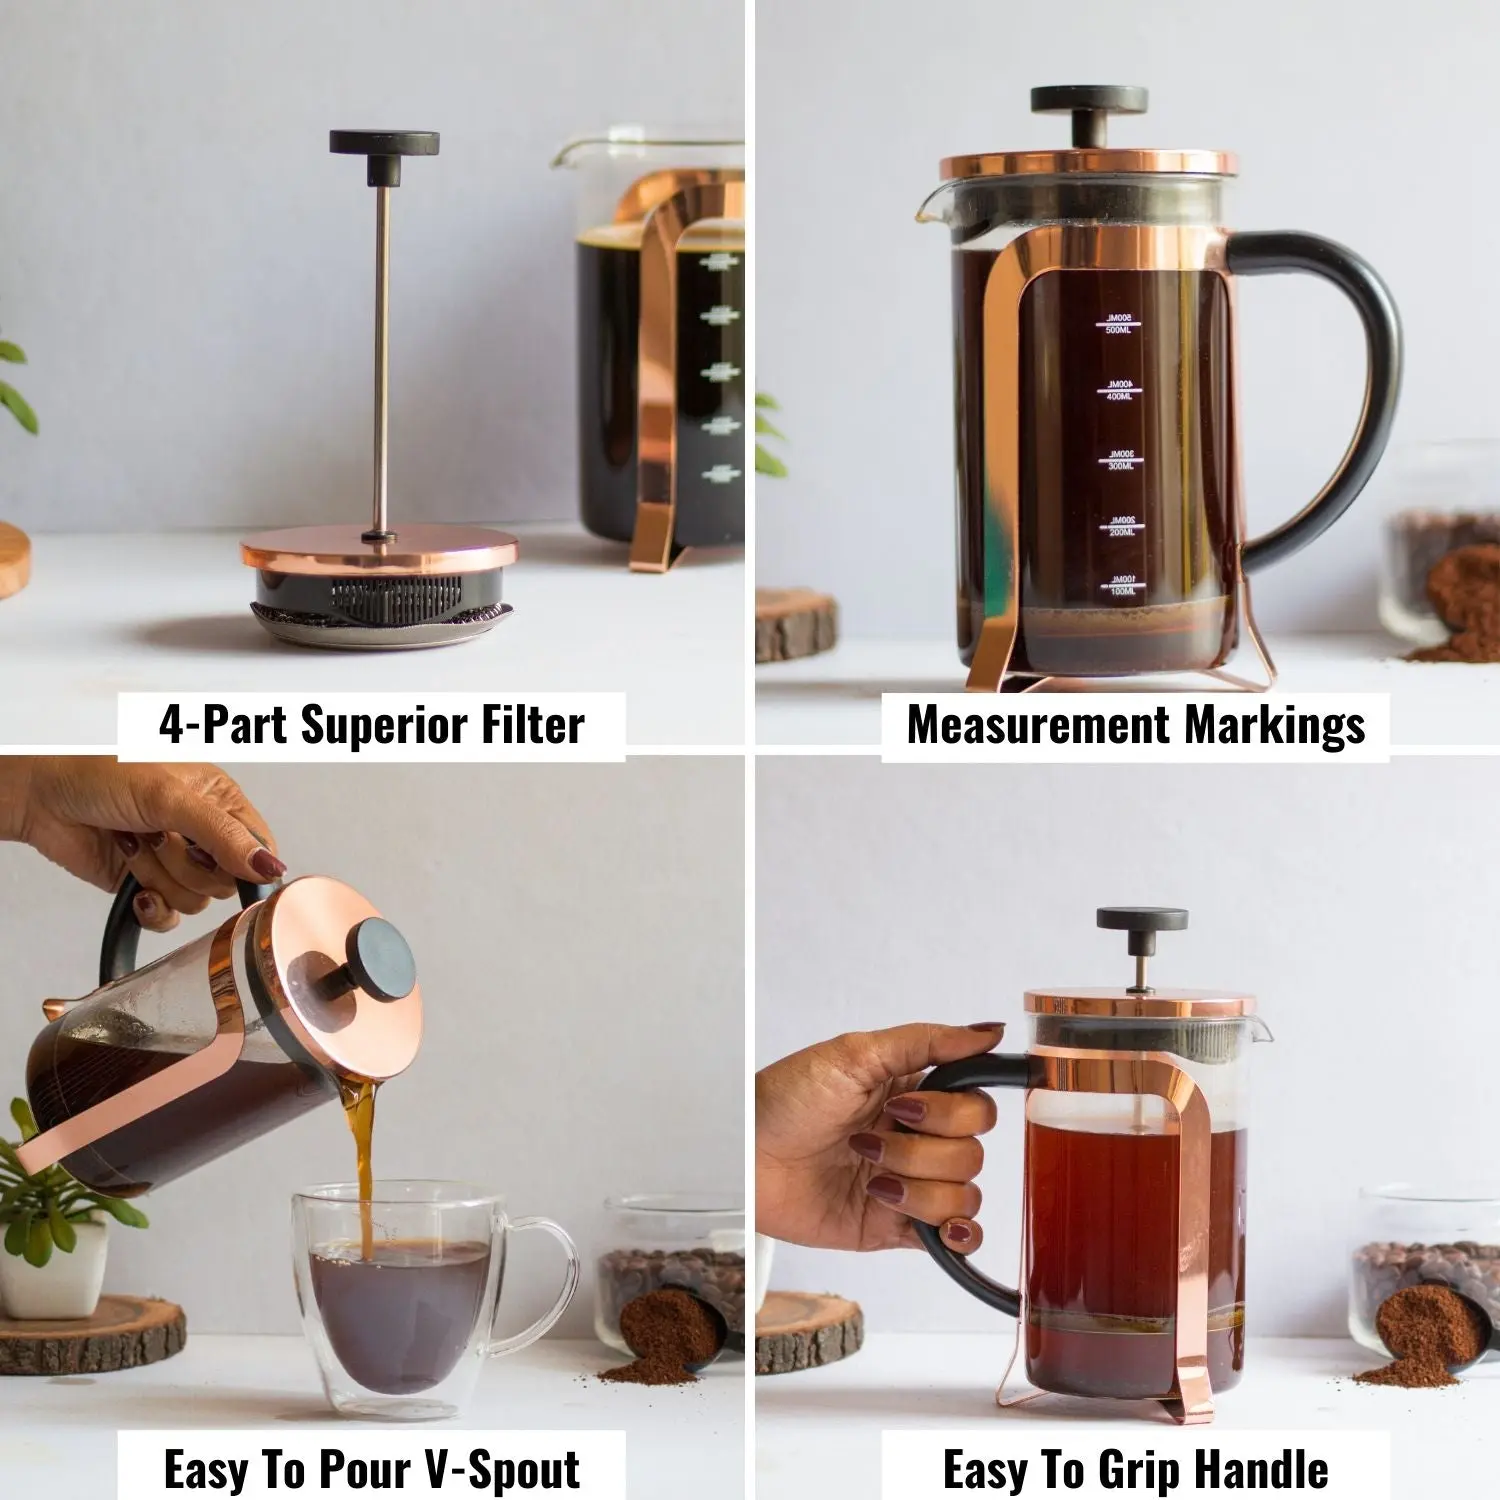
Measurement Markings
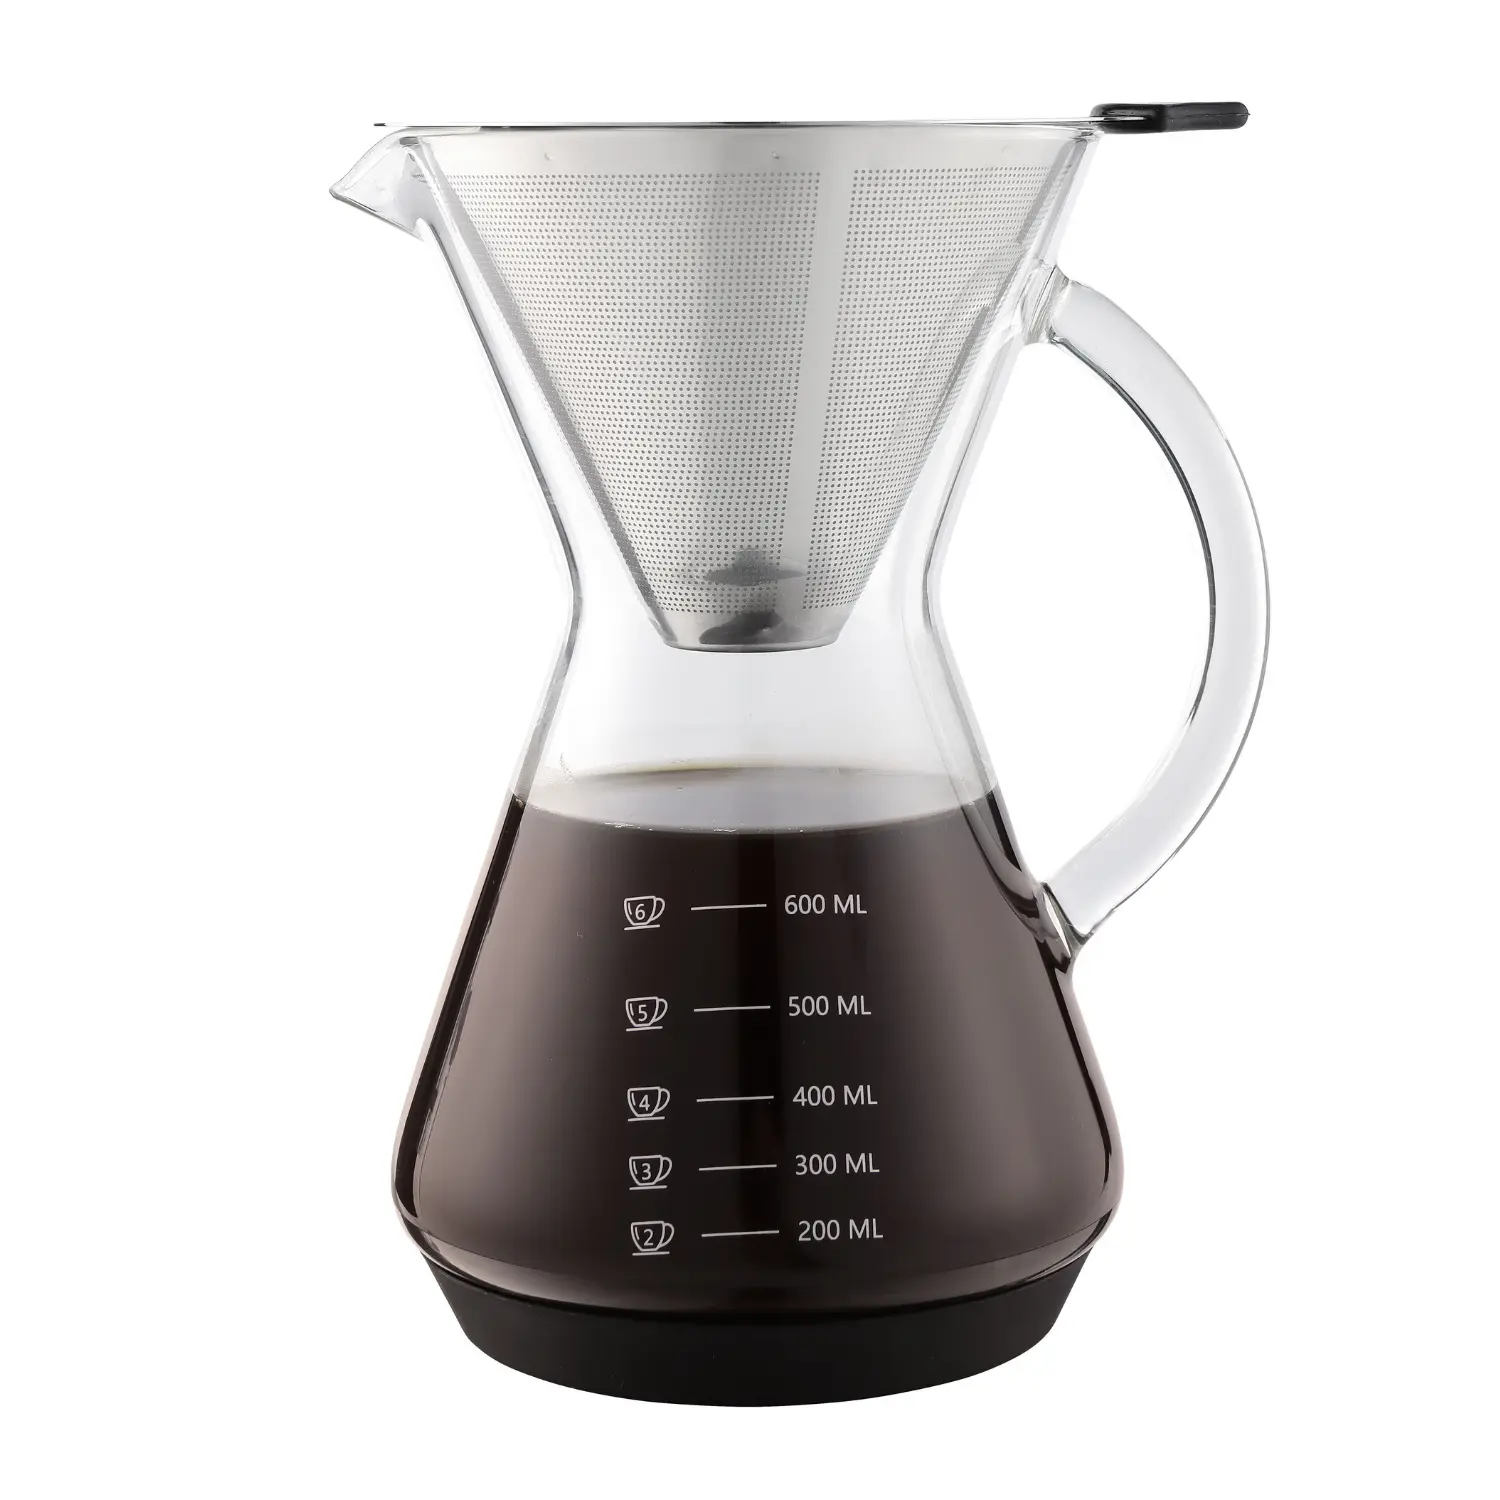
This french press comes with water level markings on its glass carafe.
These measurement markings will help you to use exact amounts of water and coffee powder to get your perfect brew each time!
Your expensive coffee powder will not be wasted, which means more savings to you.

4-Part Superior Filteration
4 part filtration system allows for a smooth coffee press mechanism and helps you to brew a perfect cup of coffee in just 4 minutes.
You will be amazed at how easy it is to make a great cup of coffee using our coffee plunger.
Just a gentle press is enough for this filter to work its magic.

Easy To Pour V-Spout
This coffee plunger comes with a V-spout and it offers the following benefits
- It helps you to pour your coffee effortlessly.
- It prevents your coffee from spilling while you pour.

Easy To Grip Handle
This coffee maker has a very easy to grip handle and helps you to use this french press effortlessly.
Also, this handle is heat resistant. No matter how hot your coffee is you will not feel a thing.
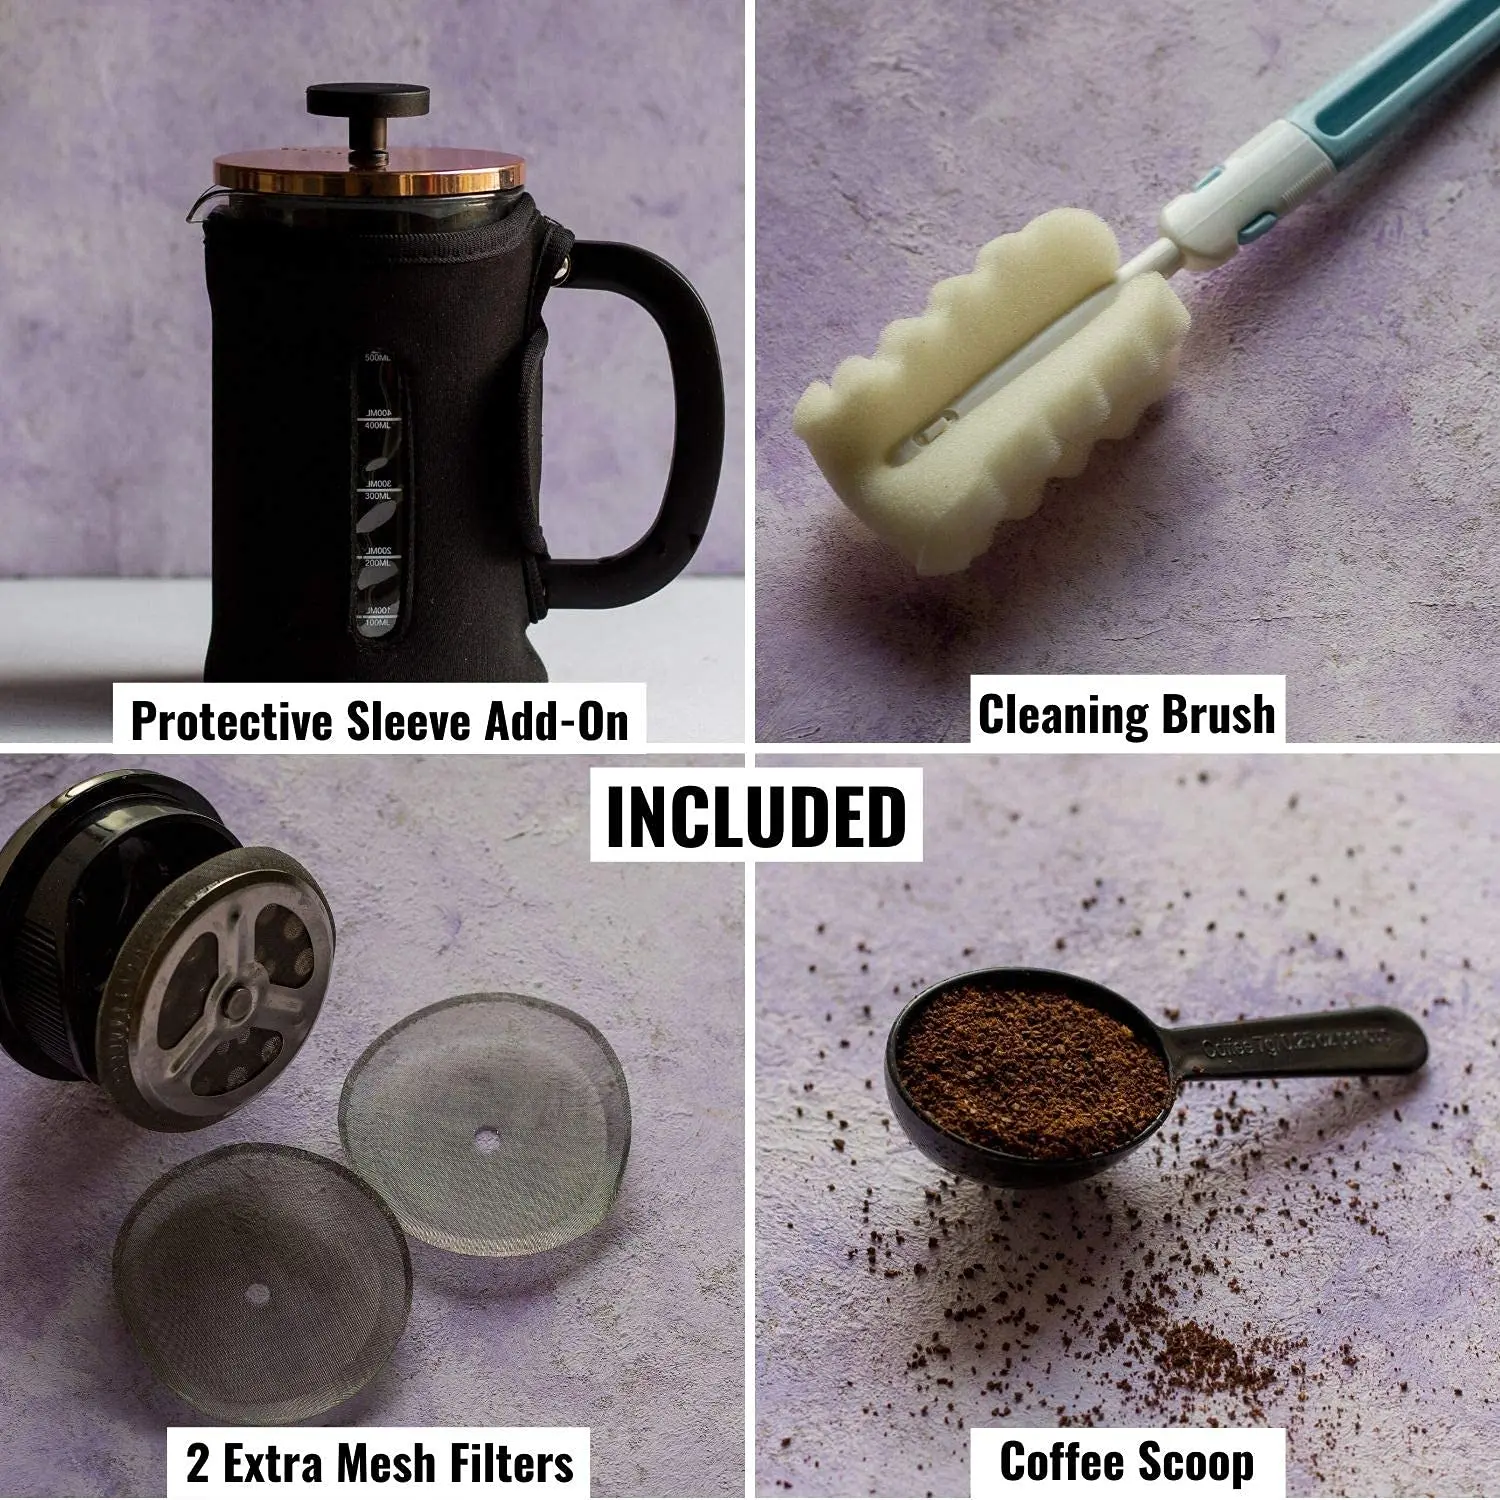
FREE Accessories Included

2 Extra Mesh Filters
This french press coffee maker also comes with 2 spare mesh filters.
These spare filters will last really long. No need to buy filter replacements for a long time.

Cleaning Brush
This coffee plunger comes with a cleaning brush add-on.
This cleaning brush has soft sponge-like bristles and will help you to clean your french press quickly and will not scratch your glass carafe.
Using this brush will keep your french press will looking brand new for a very long time!

Coffee Scoop
This french press coffee maker also comes with a small coffee scoop.
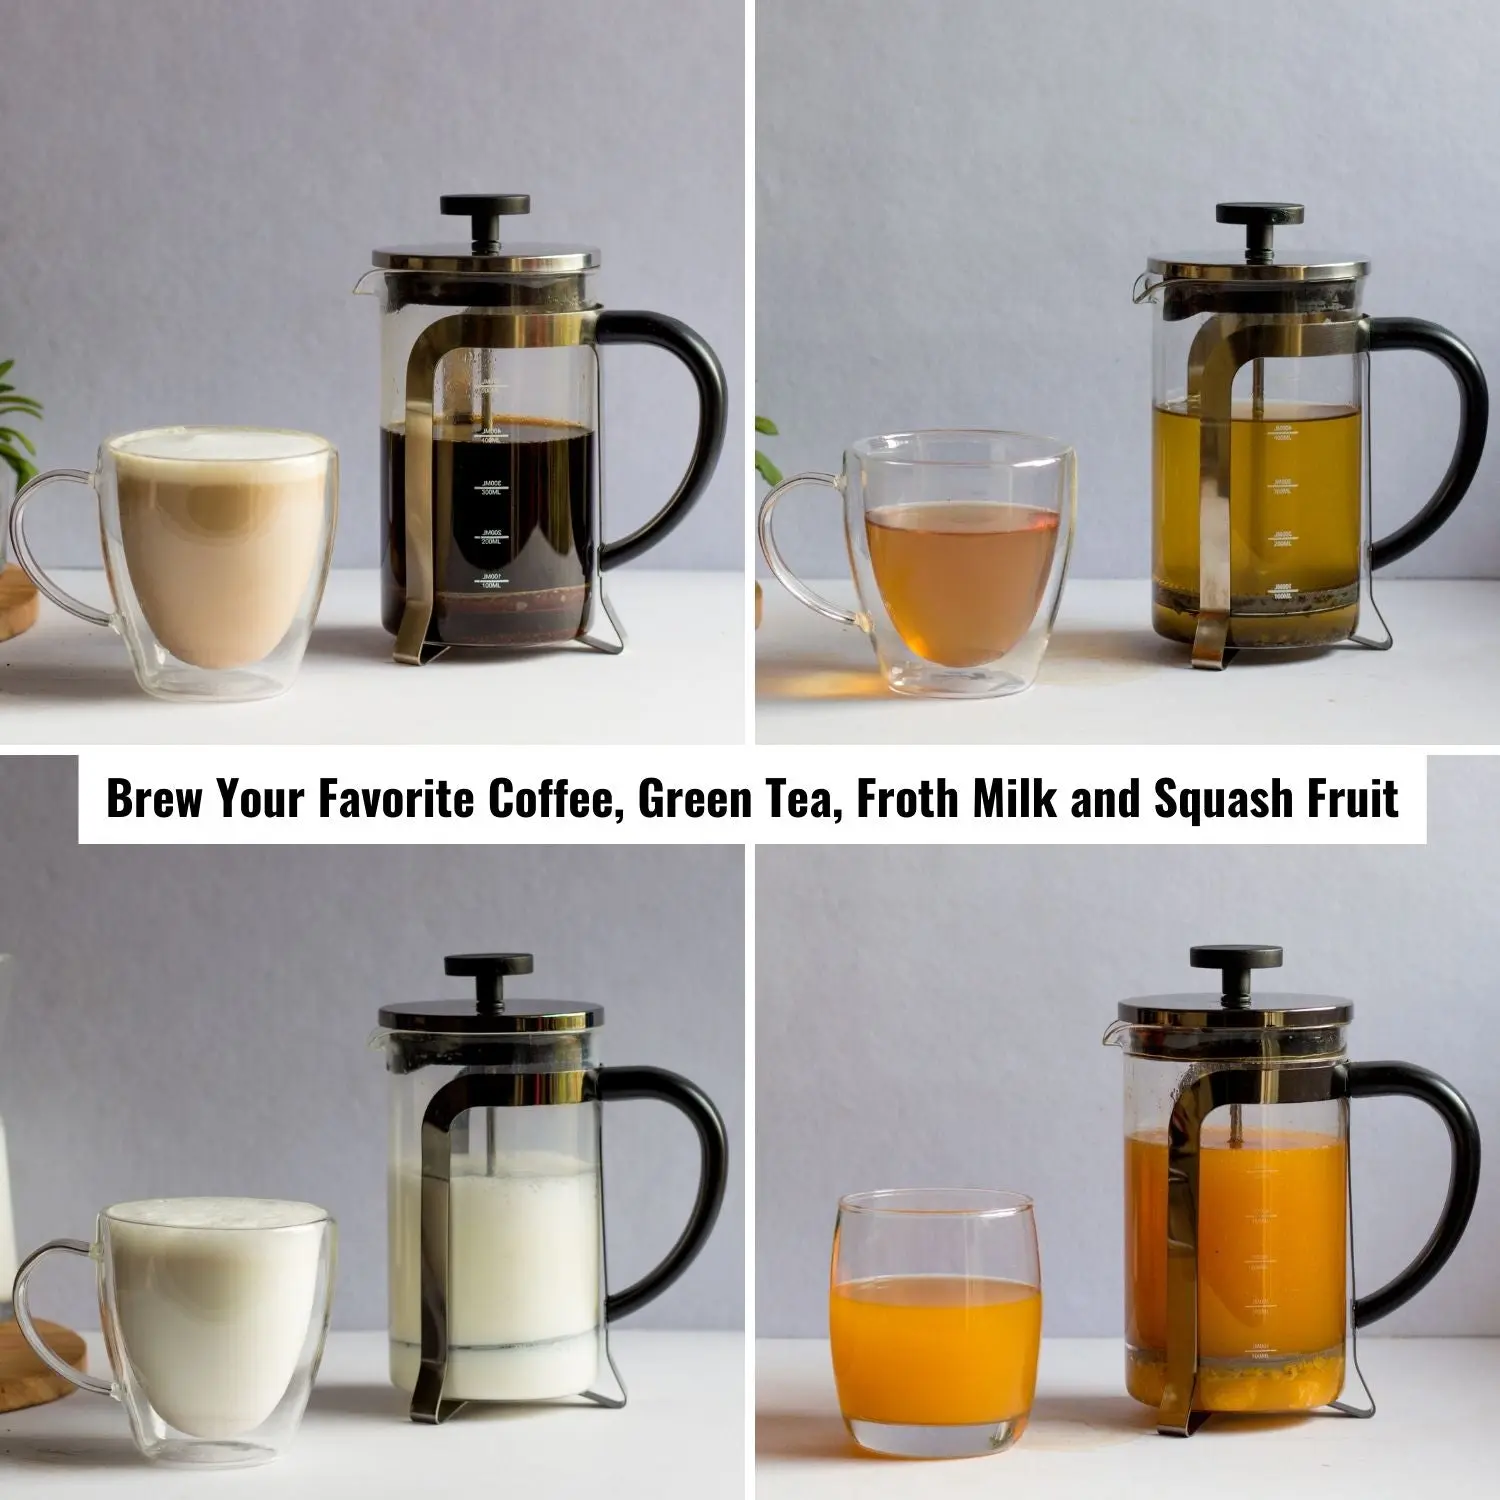
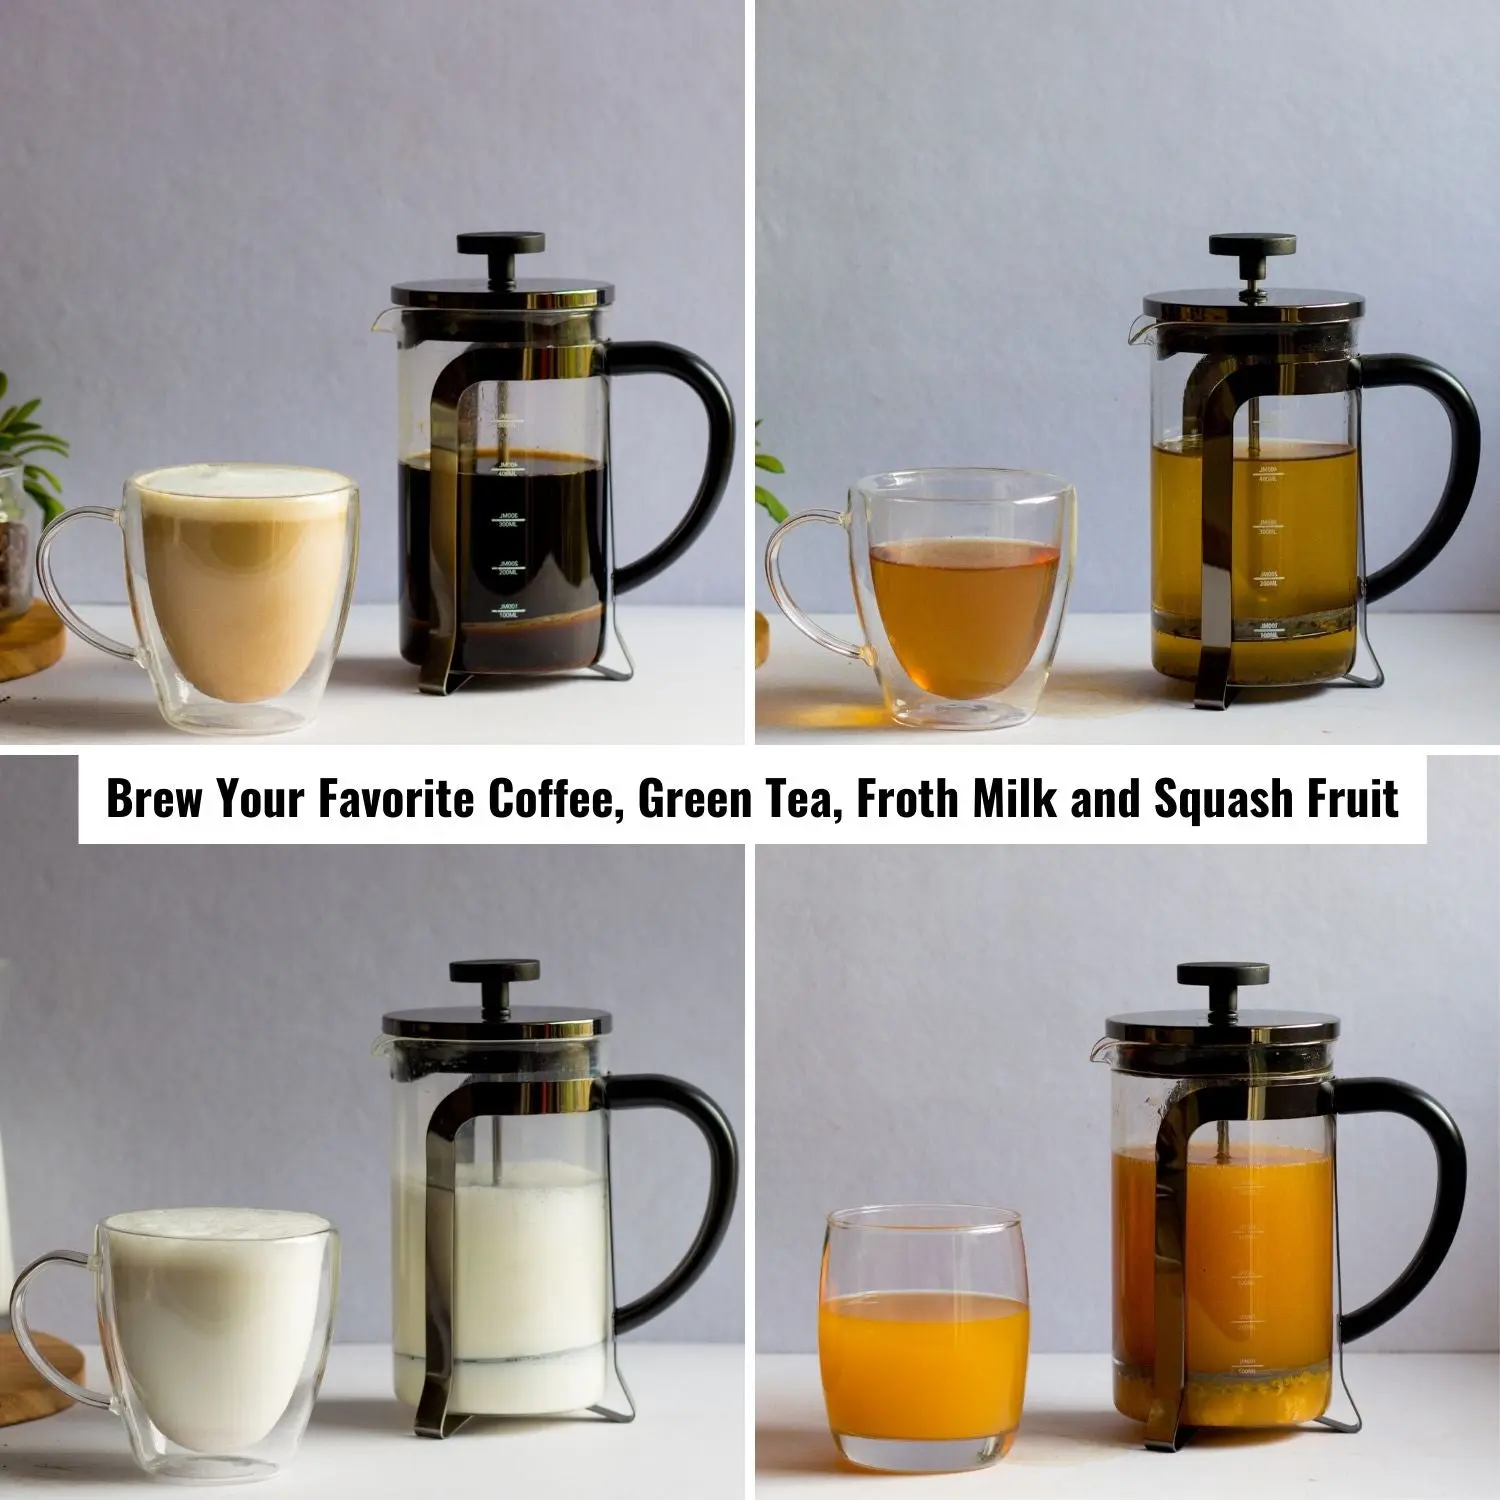
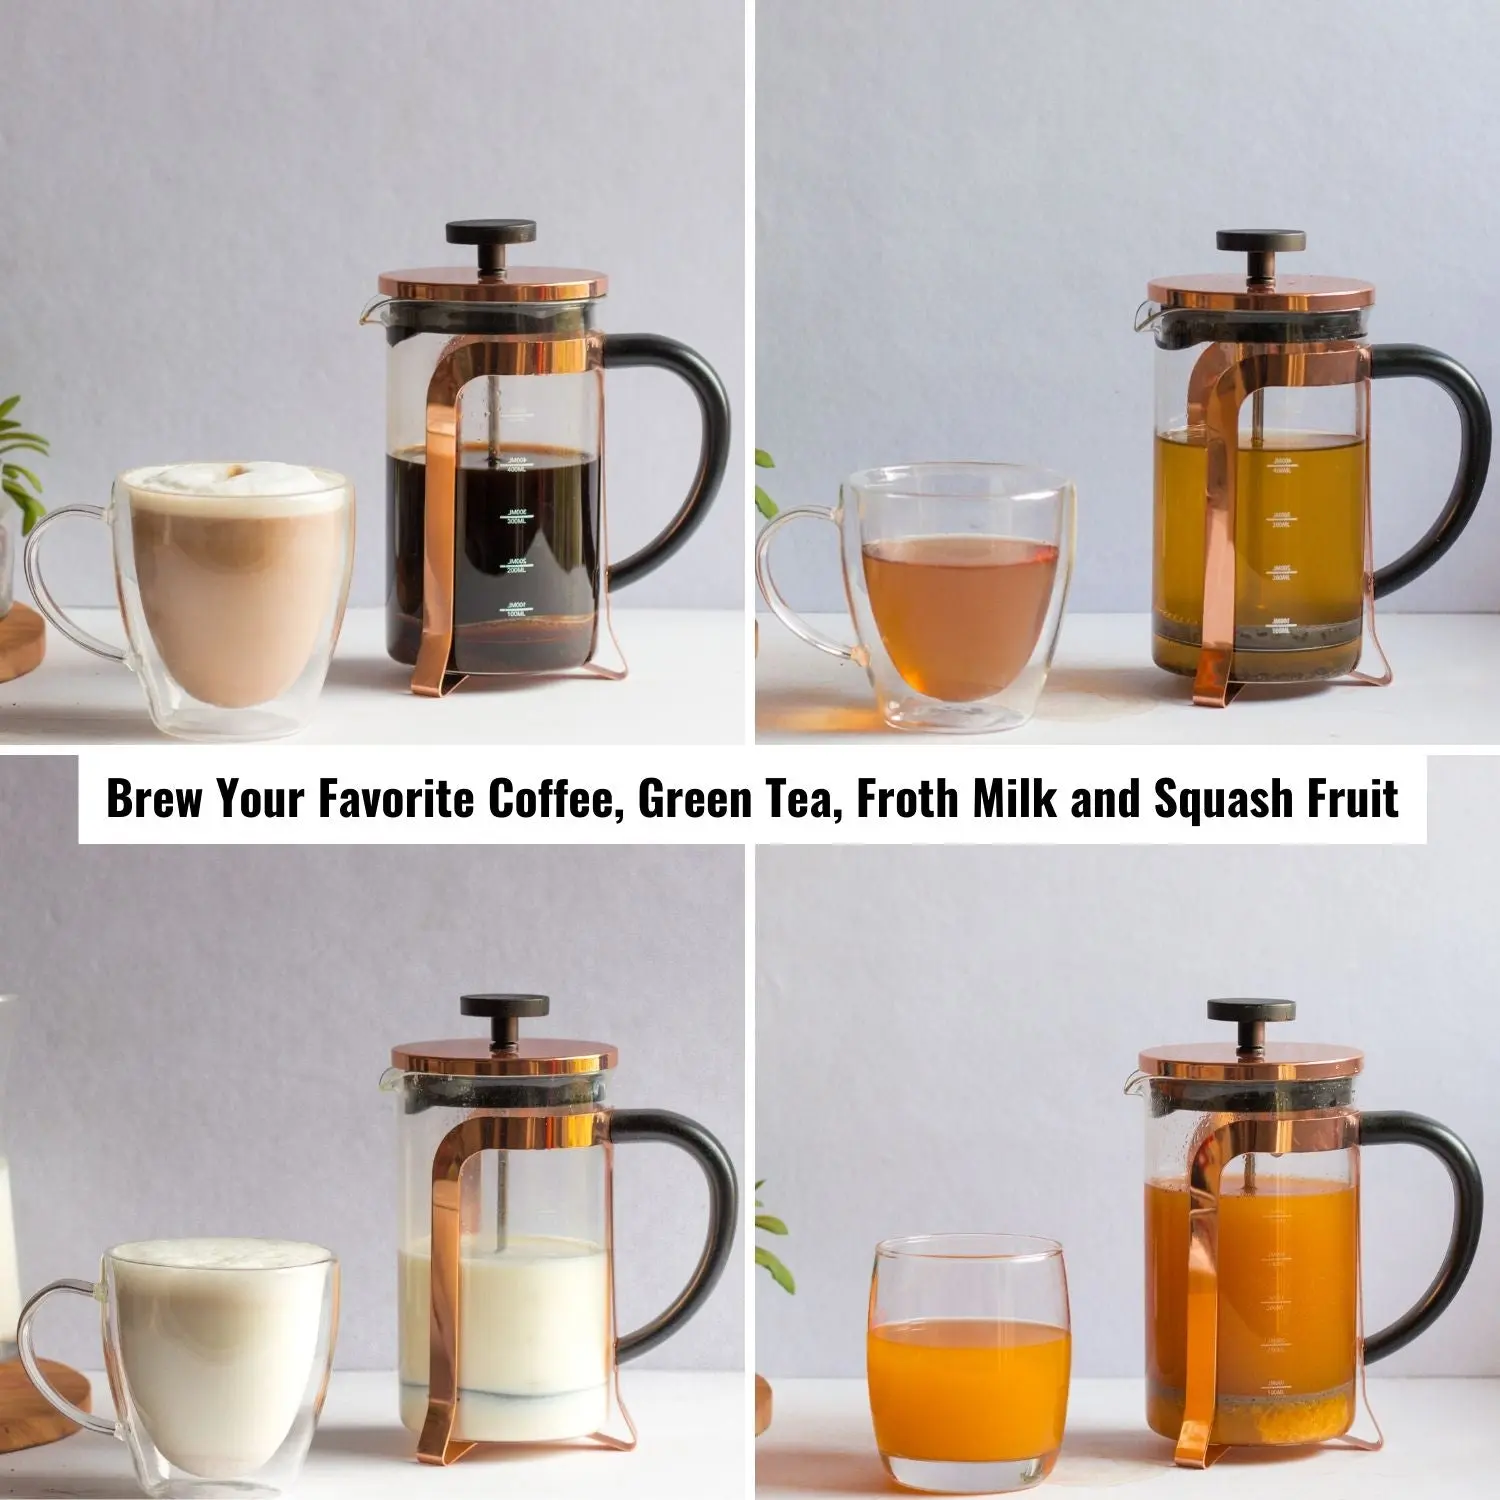
Multi-Purpose

Multi-Purpose - Coffee
Make your favorite coffee brews like
- Espresso.
- Americano.
- Cappuccino.
- Latte.

Multi-Purpose - Tea
Make your favorite tea brews like
- Green Tea.
- White Tea.
- Detox Tea.
- Any Loose Leaf Tea.

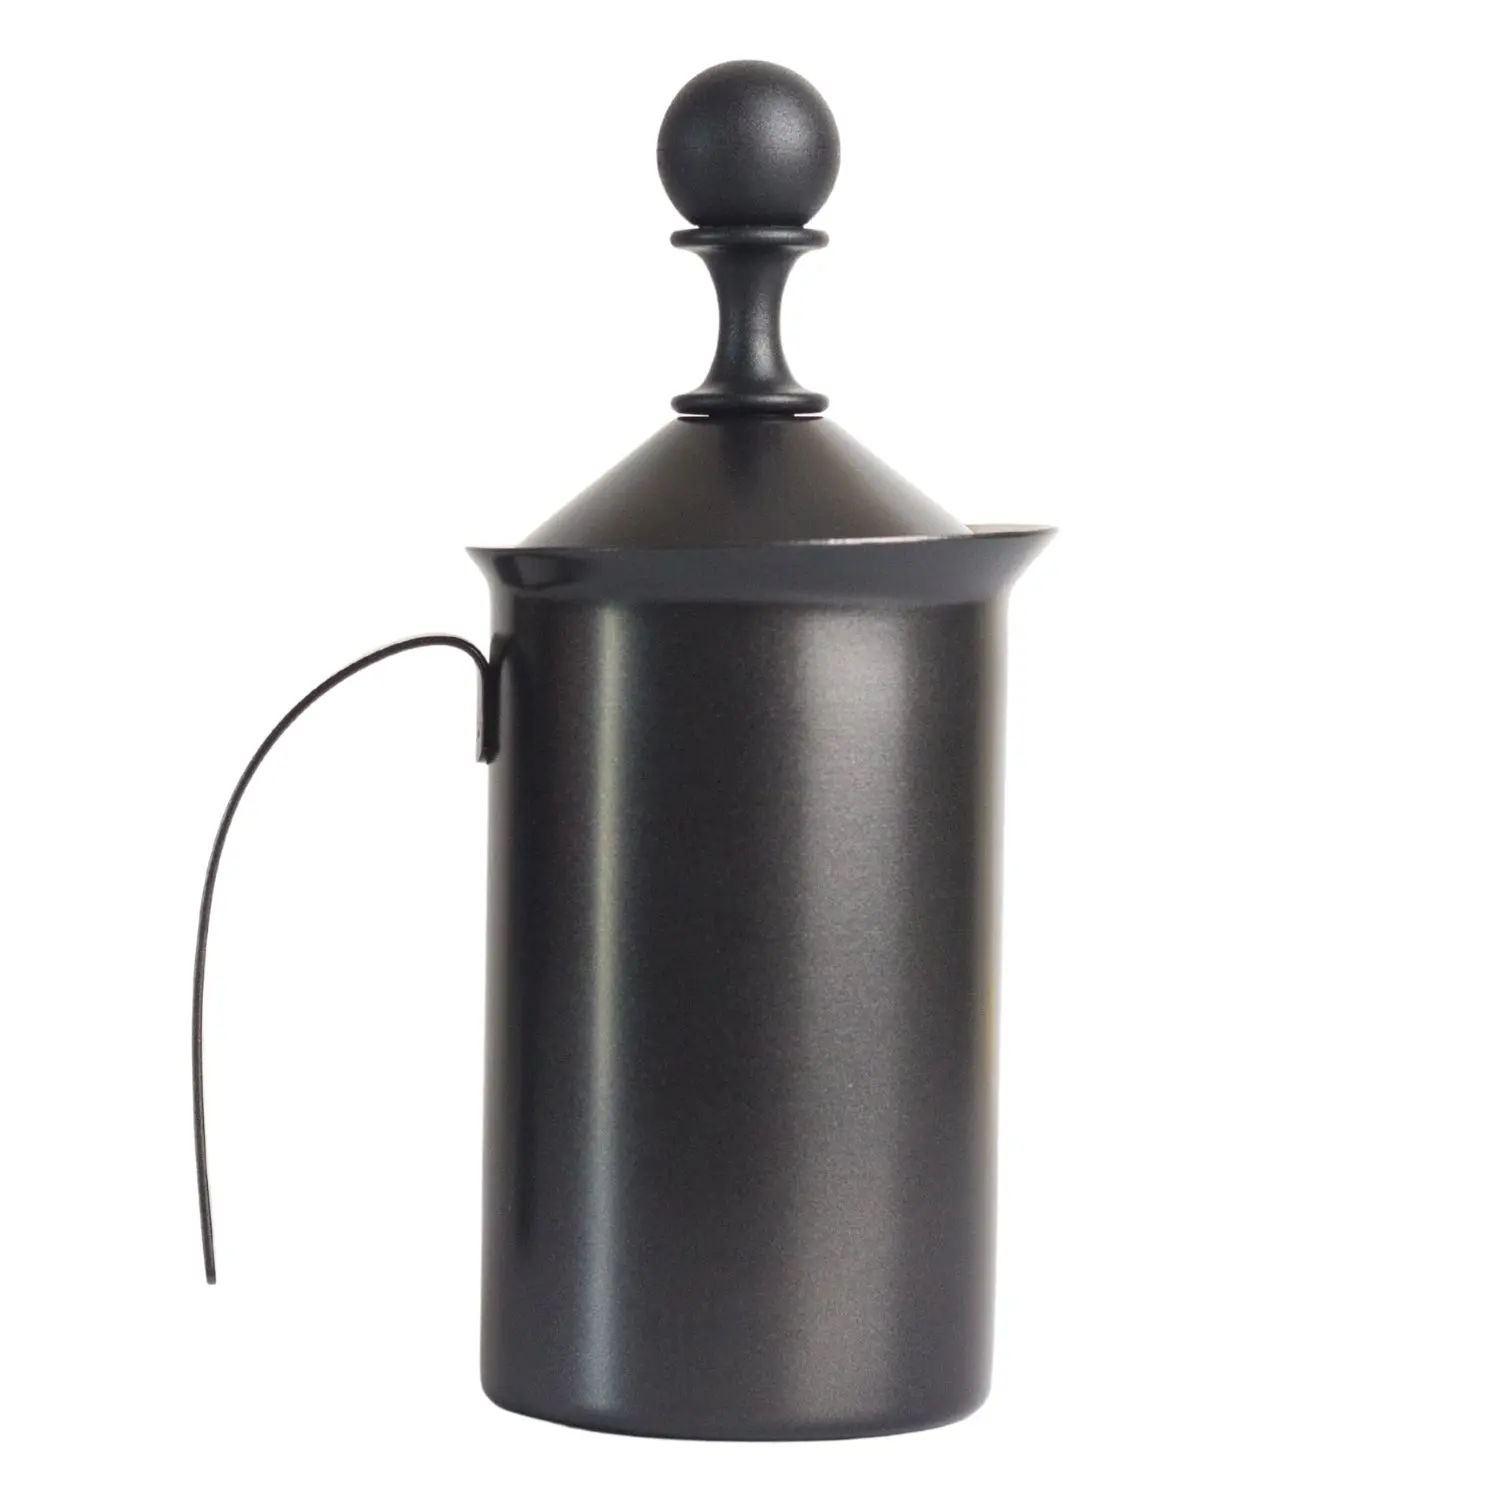
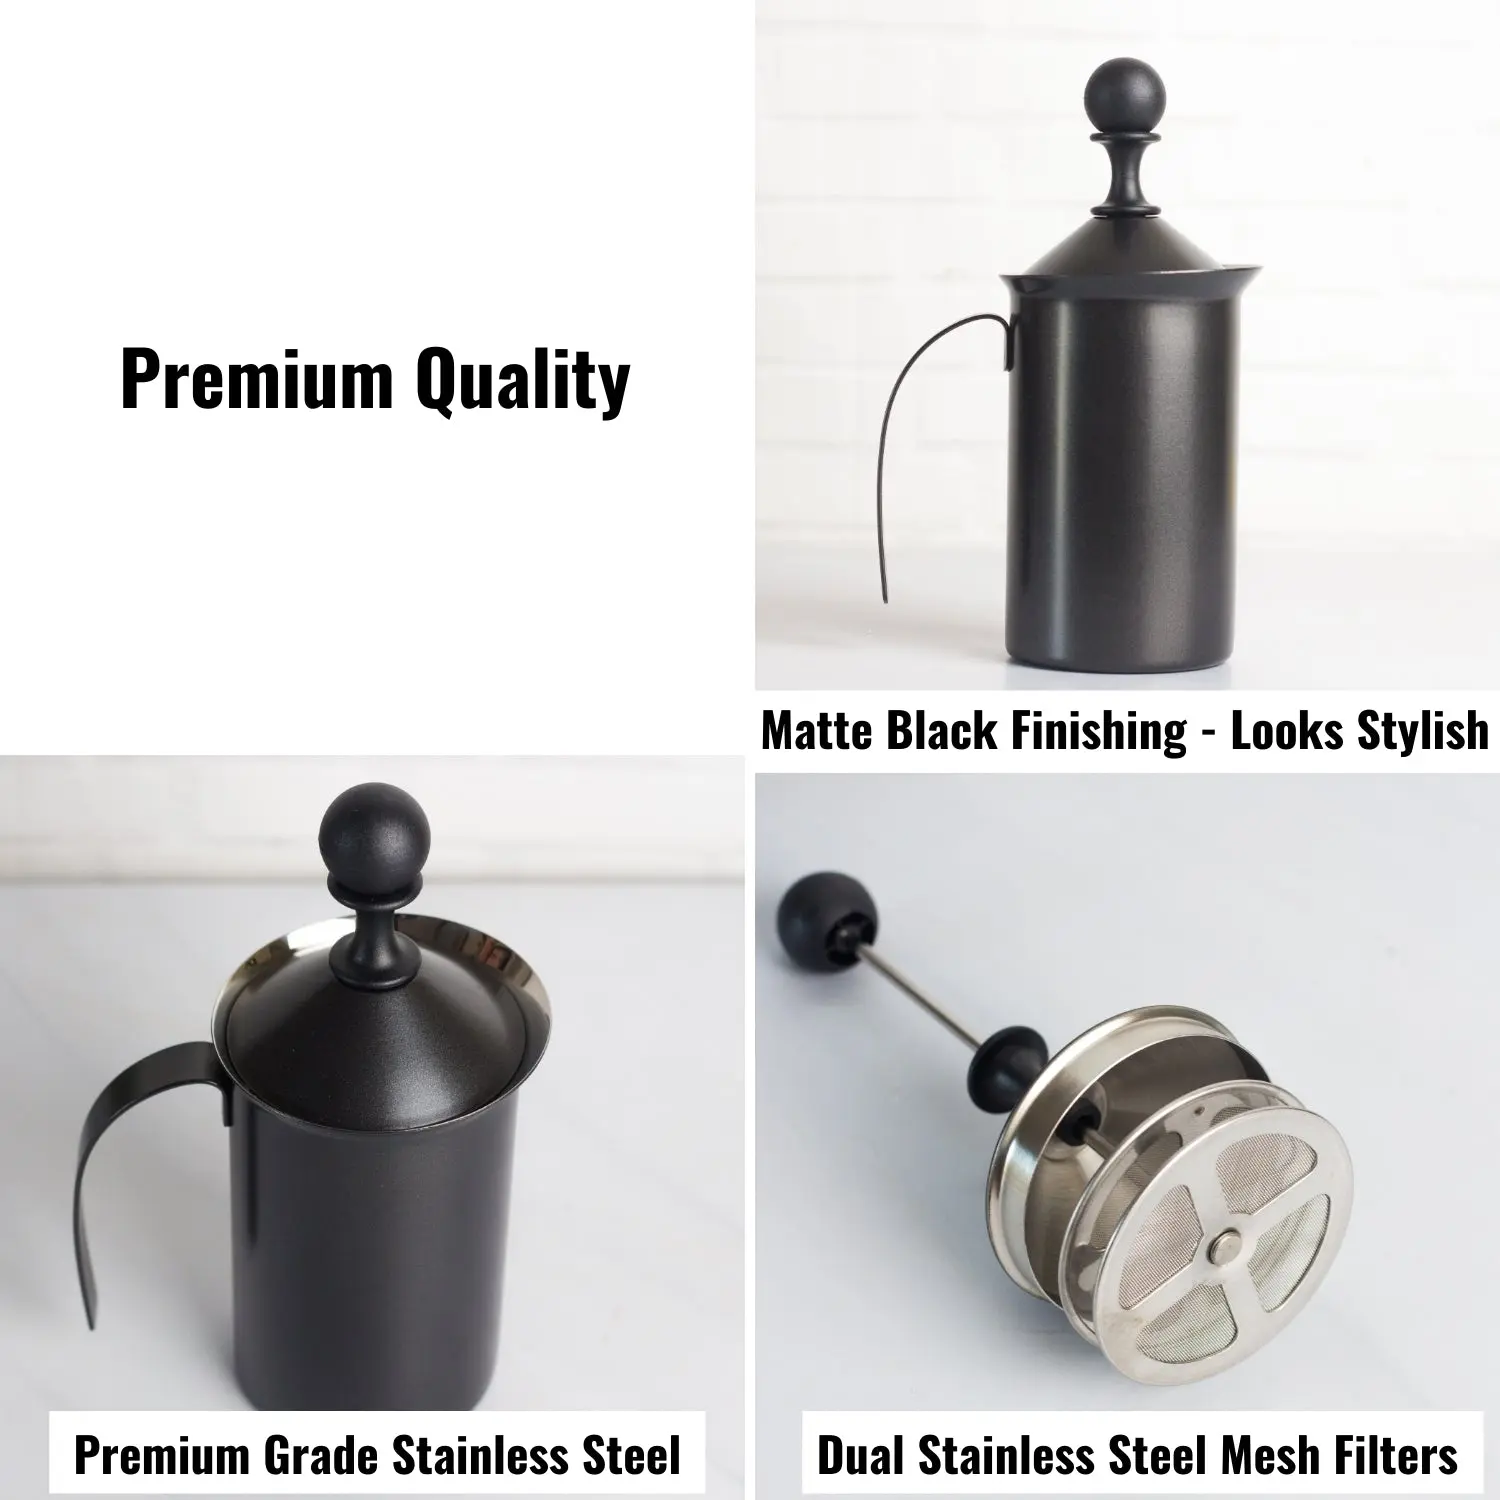
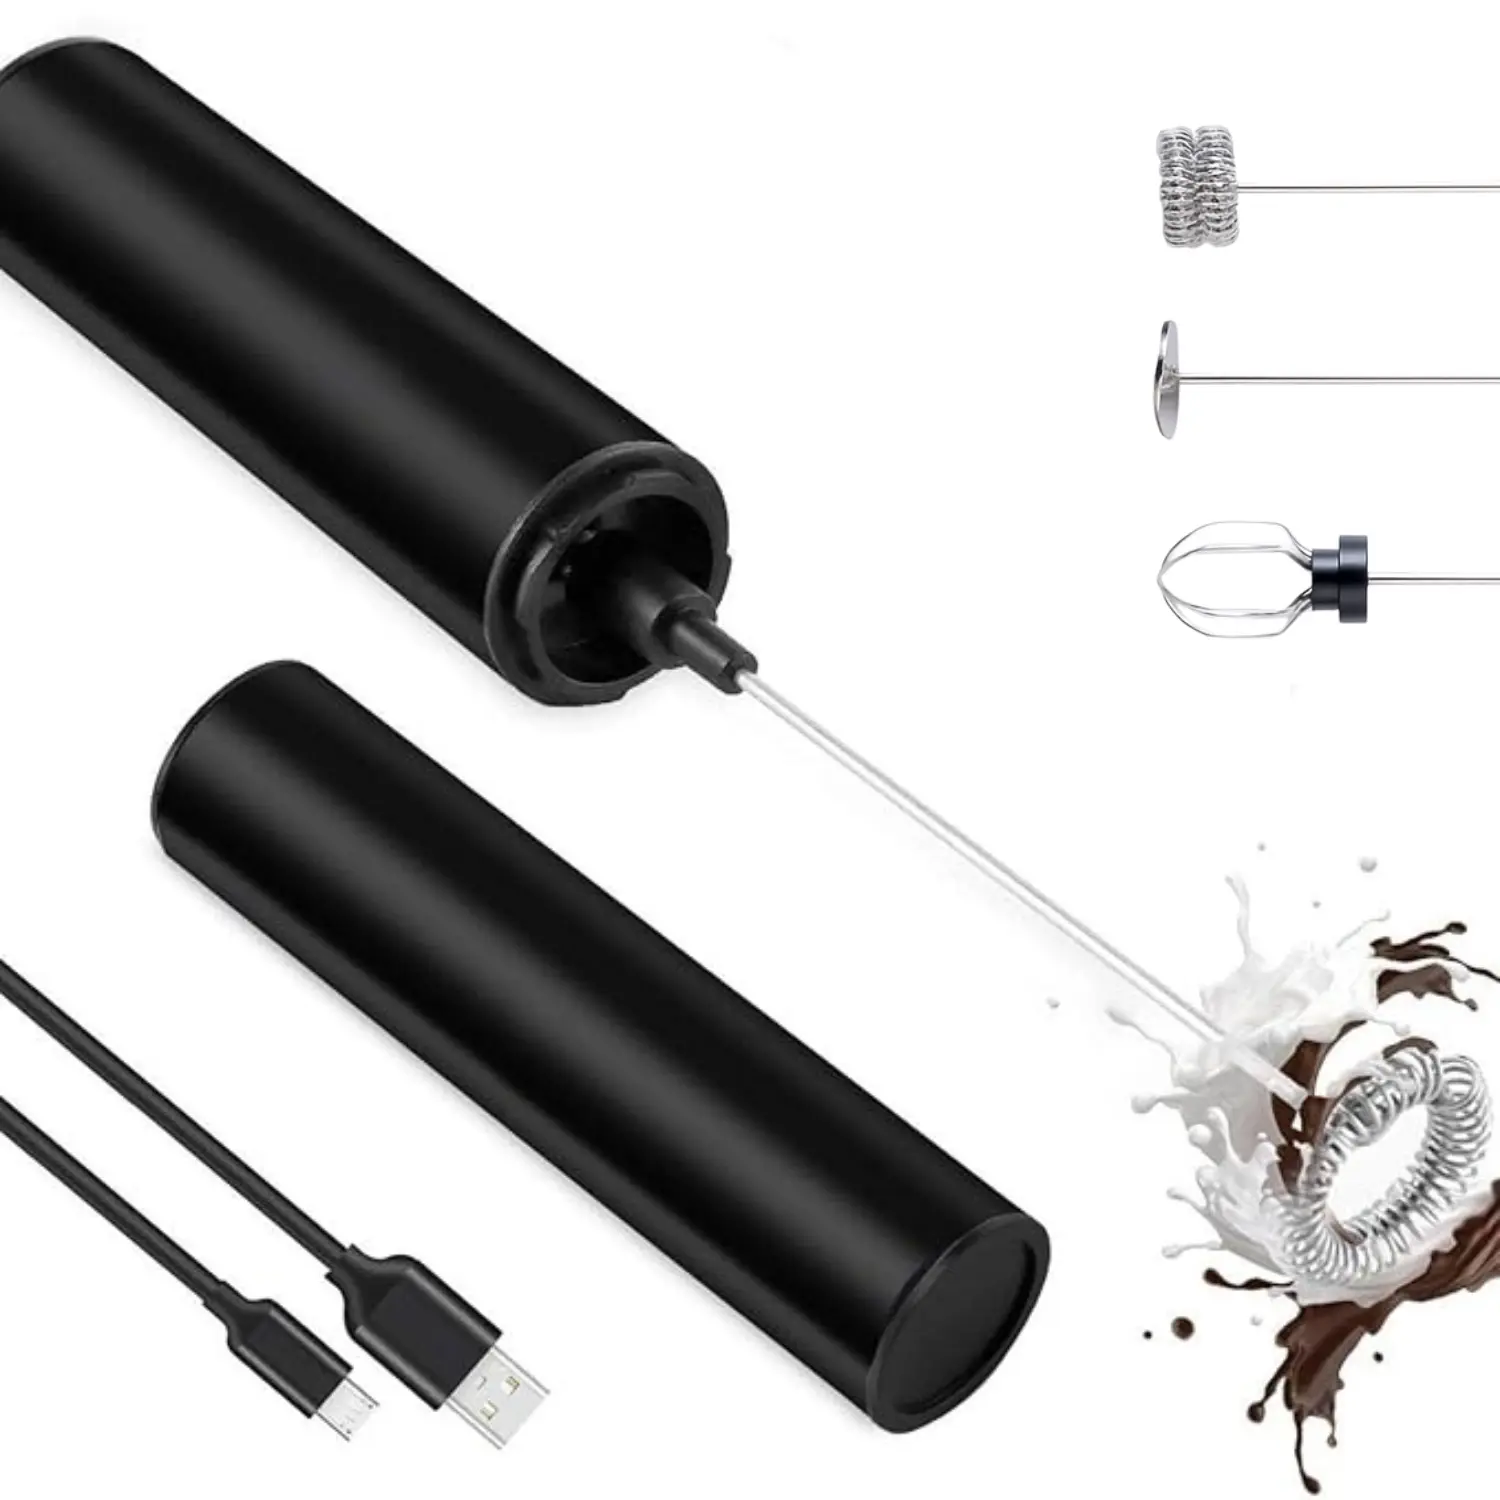
Multi-Purpose - Milk Frother
Use this coffee press as a milk frother and buttermilk maker.

Multi-Purpose - Fruit Squasher
You can also make fruit squashes like
- Watermelon Squash.
- Strawberry Squash.
- Grape Squash.
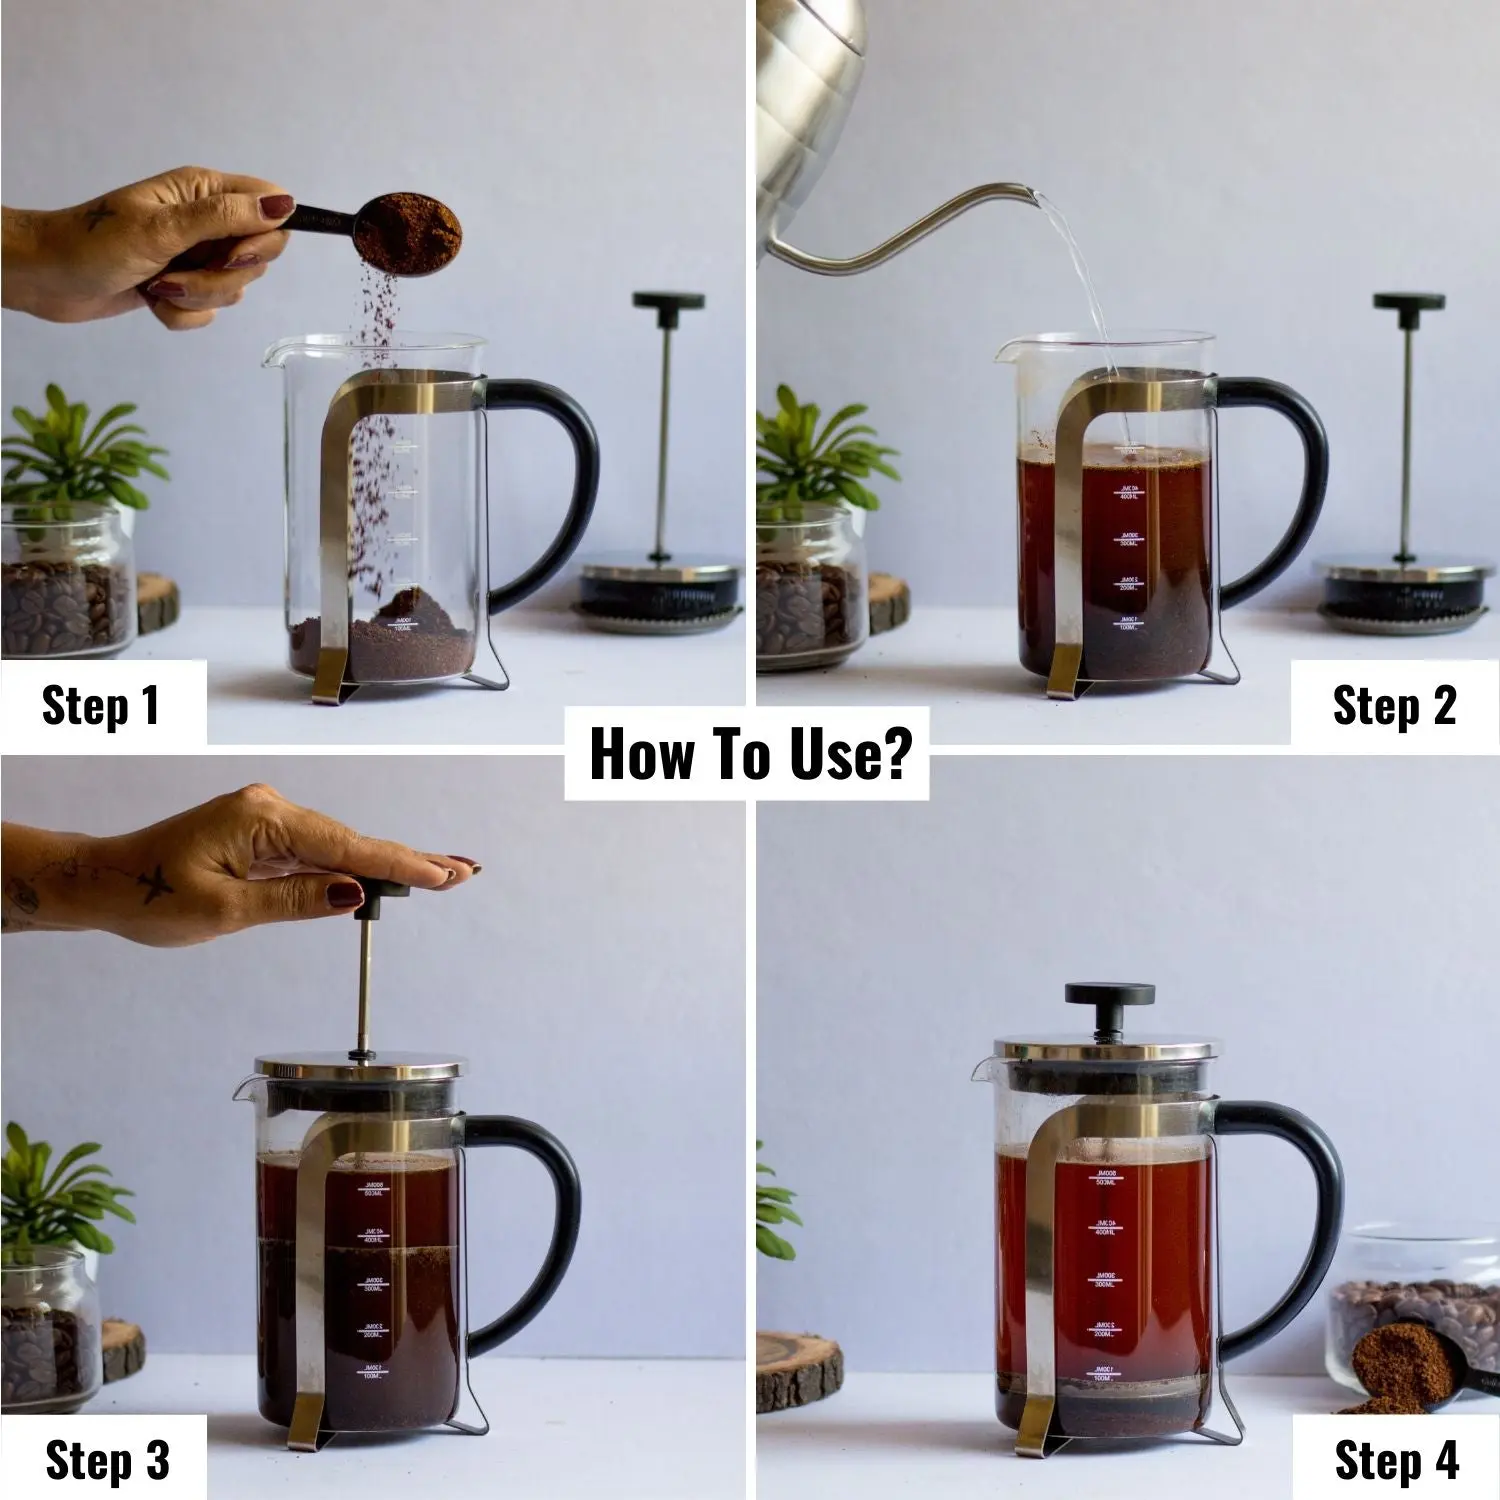
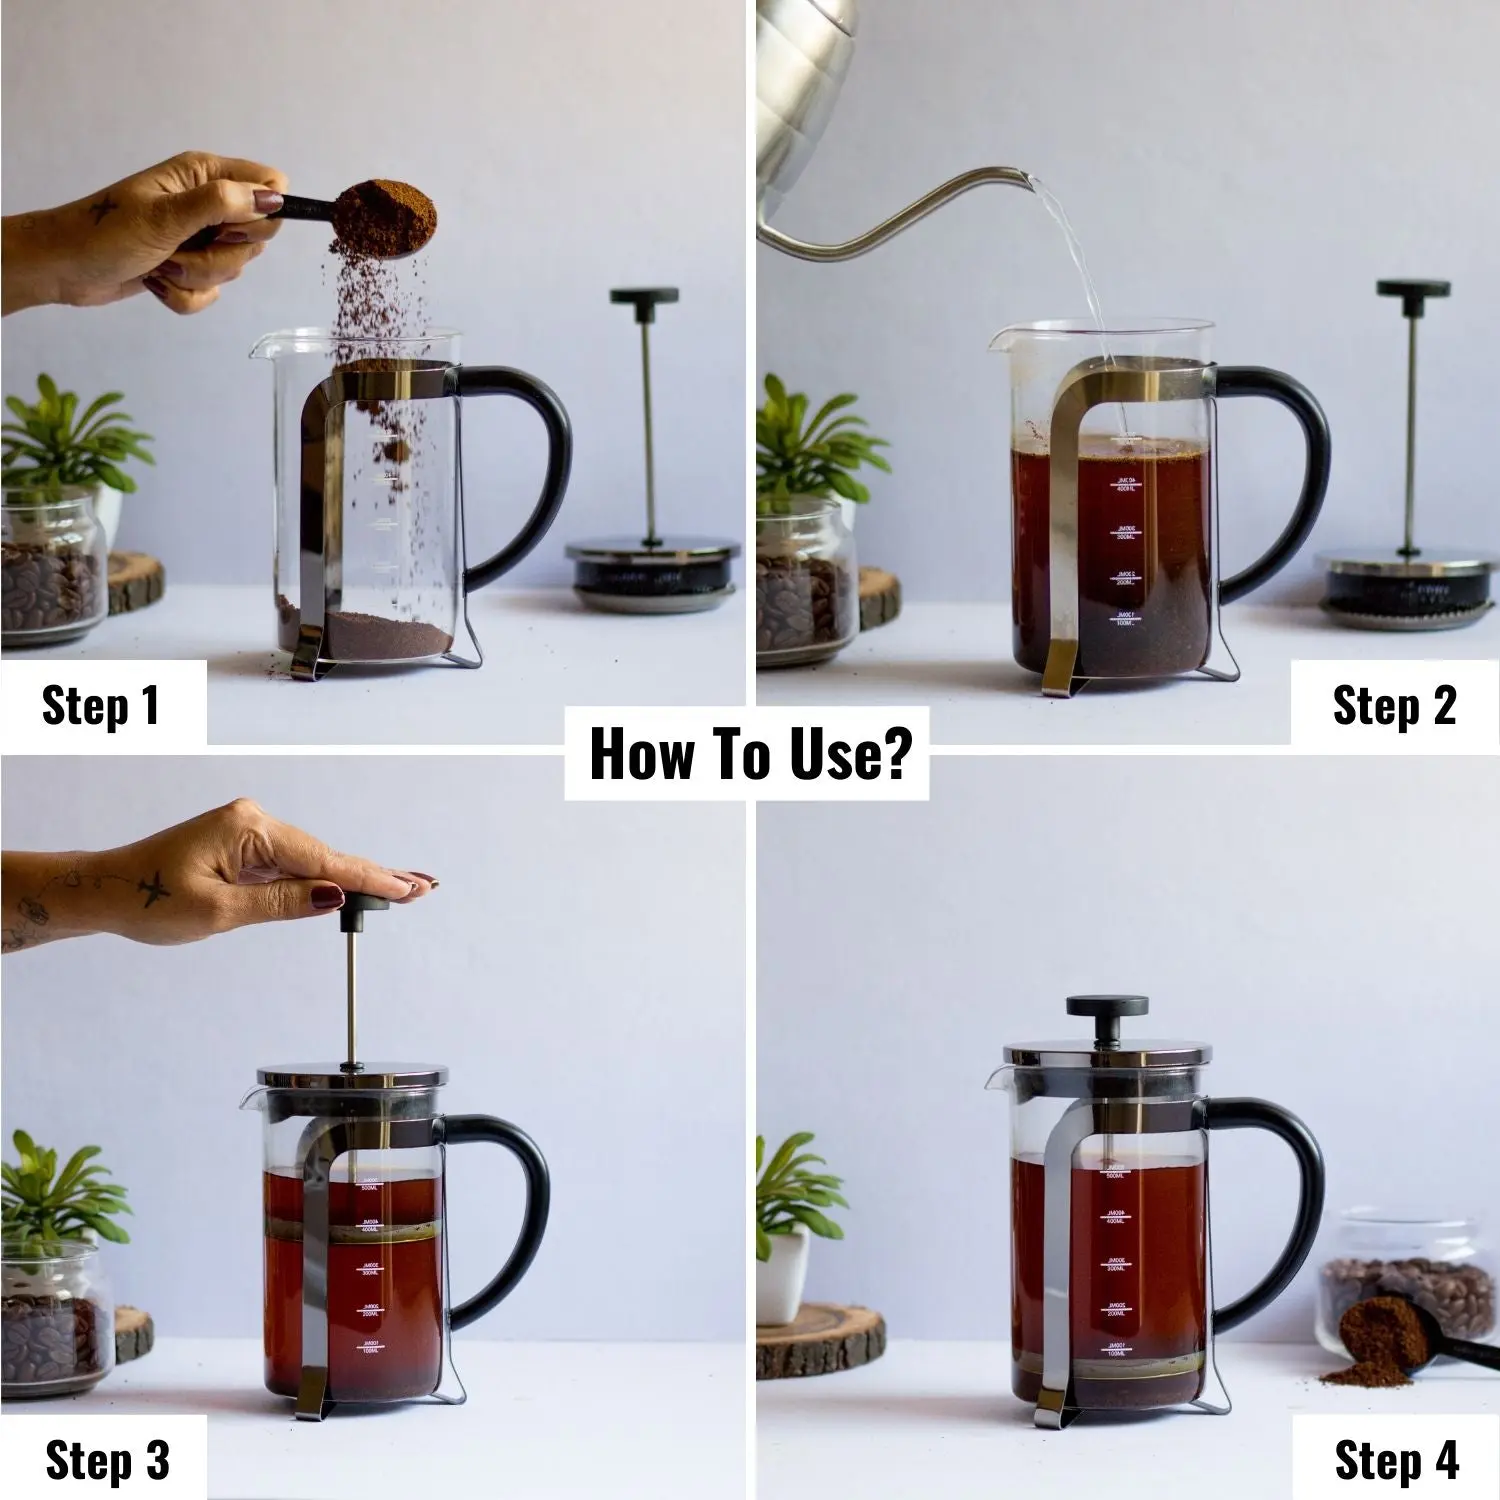
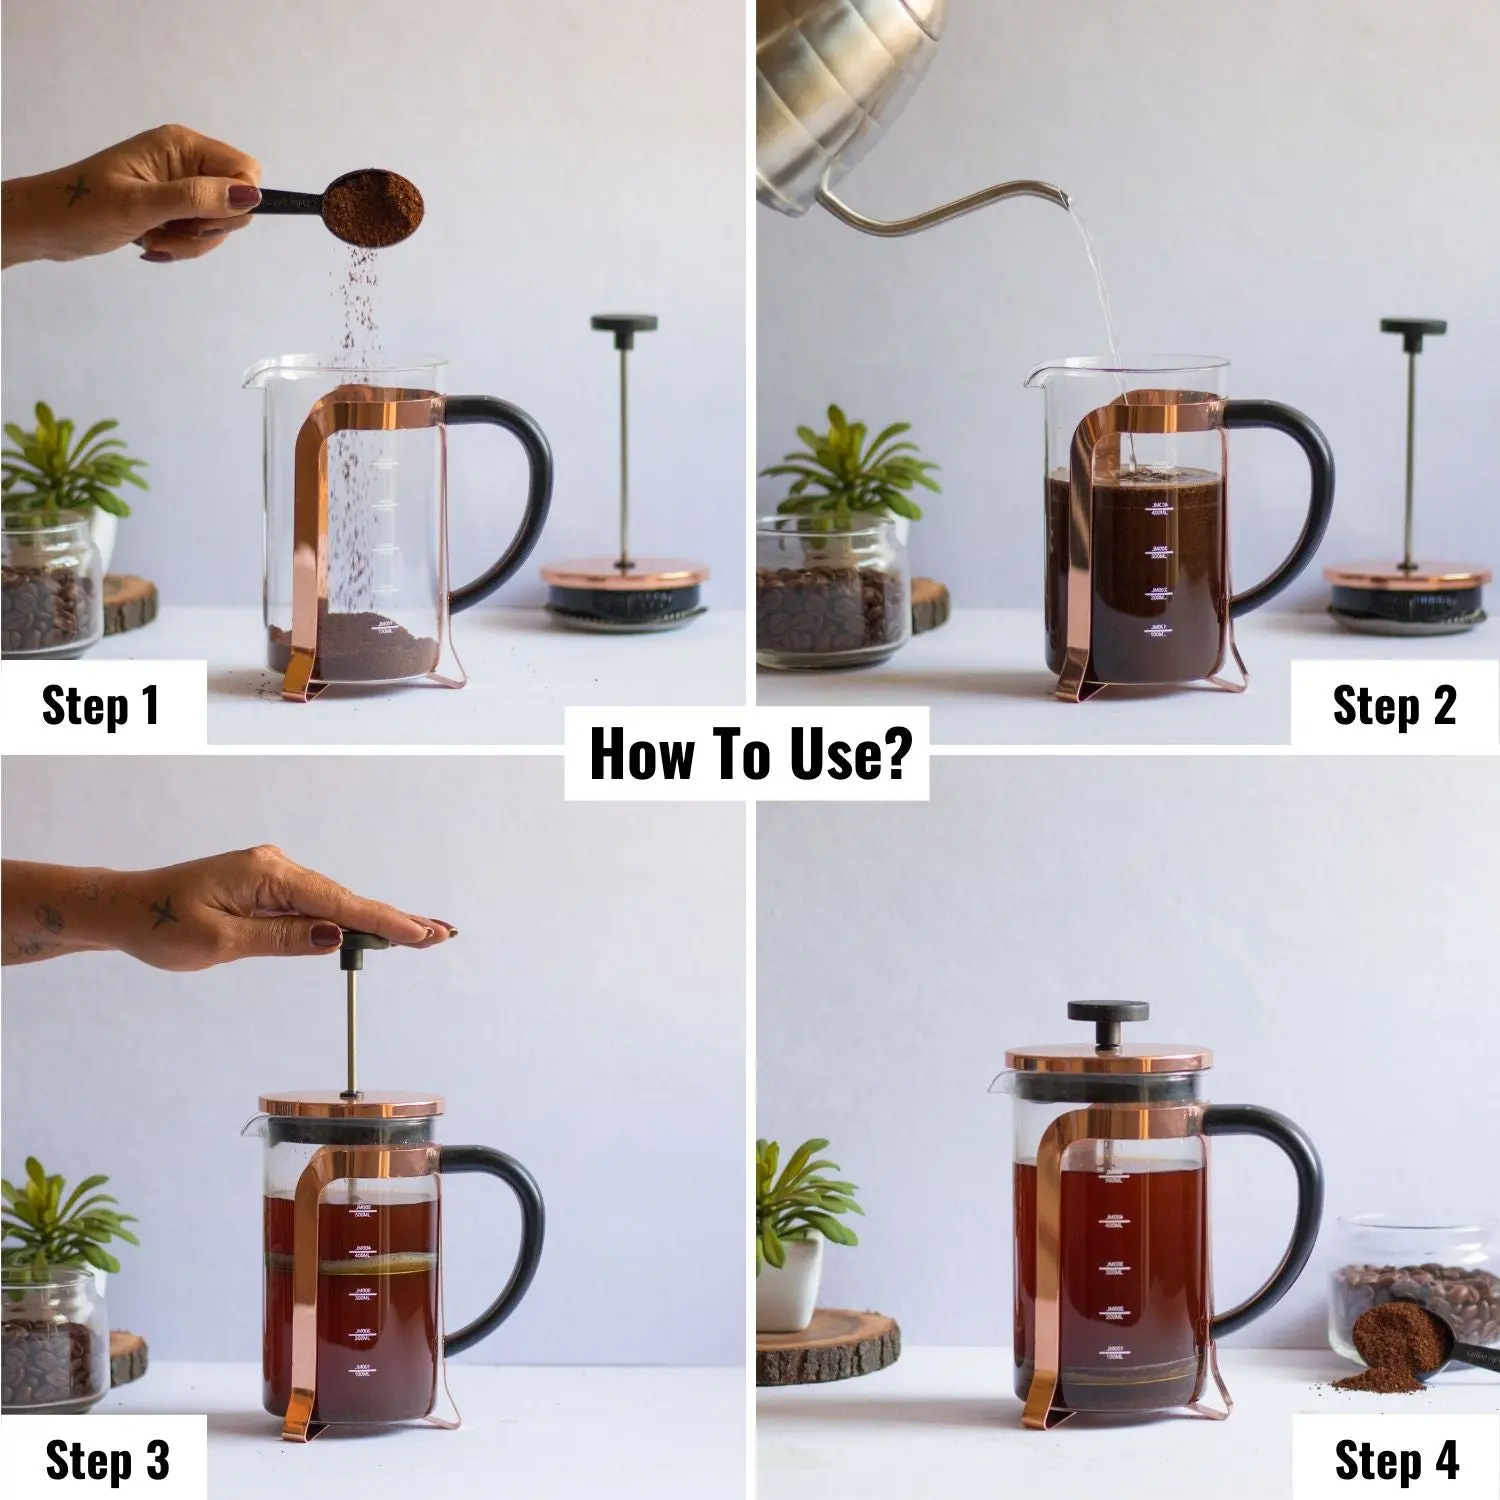
How To Use?

Step 1
Add your favorite coffee powder to your french press.
Note: Please use medium or filter grind coffee powder only.

Step 2
Pour boiling hot water into your carafe.

Step 3
Wait for 3 to 4 minutes then press until your plunger is at the bottom.

Step 4
Now serve this freshly brewed coffee into your mug.
Video Transcript
[0:00] Welcome Coffee Enthusiast. Today, let's master the art of using the three-in-one powder filter with your InstaCurper Espresso Coffee Maker. For a single aromatic cup of espresso, attach the one cup filter by turning it clockwise, add one scoop of your favourite fresh ground coffee to the filter. Tant the coffee grounds firmly, creating a perfect base for your espresso. Now, lock the filter by turning it anticlockwise, securing the grounds in place.
[0:30] Ready for the magic? Press the one cup button and watch as a single shot of espresso, ground with cream or fills your cup. For a bolder experience with a double shot, attach the two-cup filter to the pota filter. Add two generous scoops of coffee grounds, next, it's time to tamper the coffee grounds. This step is crucial for optimal water extraction while brewing.
[1:00] Lock the pota filter and press the two-cup button to start brewing. Behold, as two shots of espresso with velvety cream or fills your cup. To switch things up with easy-serve espresso pods, attach the one-cup filter. Insert your favourite easy-serve espresso pod into the filter for a hassle-free experience.
[1:30] Lock the pota filter securely and press one cup to brew. Watch as the rich aromatic coffee quarters your easy-serve espresso pods fill your favourite mug. You have mastered the versatile 3-in-1 pota filter with your insta-cupper espresso coffee maker. Enjoy your perfect cup every day. Brew it simple, brew it with insta-cupper.
Video Transcript
[0:00] Welcome to your step-by-step guide on how to brew the perfect espresso with your InstaCapa ExpressoMaker. First step by filling the water tank to its maximum capacity. Next, press the power button to turn on your InstaCapa ExpressoMaker. Now, attach the One Cup filter to the Porta filter by turning it clockwise. Add one scoop of your favorite ground coffee to the filter.
[0:30] Make sure to distribute the coffee evenly for a perfect glue. Tamp the coffee firmly to ensure a rich and full-bodied espresso. Now, attach the Porta filter to the espresso maker by locking it anticlockwise. For a single espresso, simply press the One Cup button. For a double espresso, attach the Two Cup filter InstaCapa.
[1:00] Add two scoops of ground coffee. Remember to tap the coffee firmly once again. Lock the Porta filter in place. Press the Two Cup button for a double espresso. And there you have it.
[1:30] With the InstaCapa ExpressoMaker, brewing the perfect espresso has never been easier. A delicious espresso with the perfect cream, all from the comfort of your own home. So, what are you waiting for? Get your InstaCapa ExpressoMaker today and start enjoying Barista Quality espresso at home.
Video Transcript
[0:00] Welcome to the complete user guide to InstaKappa espresso brewing and milk steaming. Begin by pressing the power button to turn on your InstaKappa espresso maker. As you press the power button, the InstaKappa espresso maker comes to life. Initiating a 30 second preheating phase. This crucial step ensures that your coffee is brewed at an optimal temperature, unlocking the full flavored potential of your coffee grounds. Keep an eye on the indicated light. Once it stops flashing, it's perfect time to start brewing your espresso.
[0:30] For steaming, press the steam button to prepare the machine to reach the optimal temperature. Keep an eye on the steaming light and patiently wait until it stops flashing. Once it stops flashing, position your milk jar and insert the steaming wand after 2 cm inside the milk. Turn the knob up to steaming icon to froth your milk. Once you get the perfect froth for your latte or cappuccino, turn off the knob.
[1:00] You'll notice that the 1 cup and 2 cup buttons become inactive after steaming. To unlock and start brewing again, simply tap the steam button. There you have it. Enjoy your perfect cup.
[1:30] Brew it right, brew it with InstaKappa.
Original: $1,399.00
-65%$1,399.00
$489.65More Images

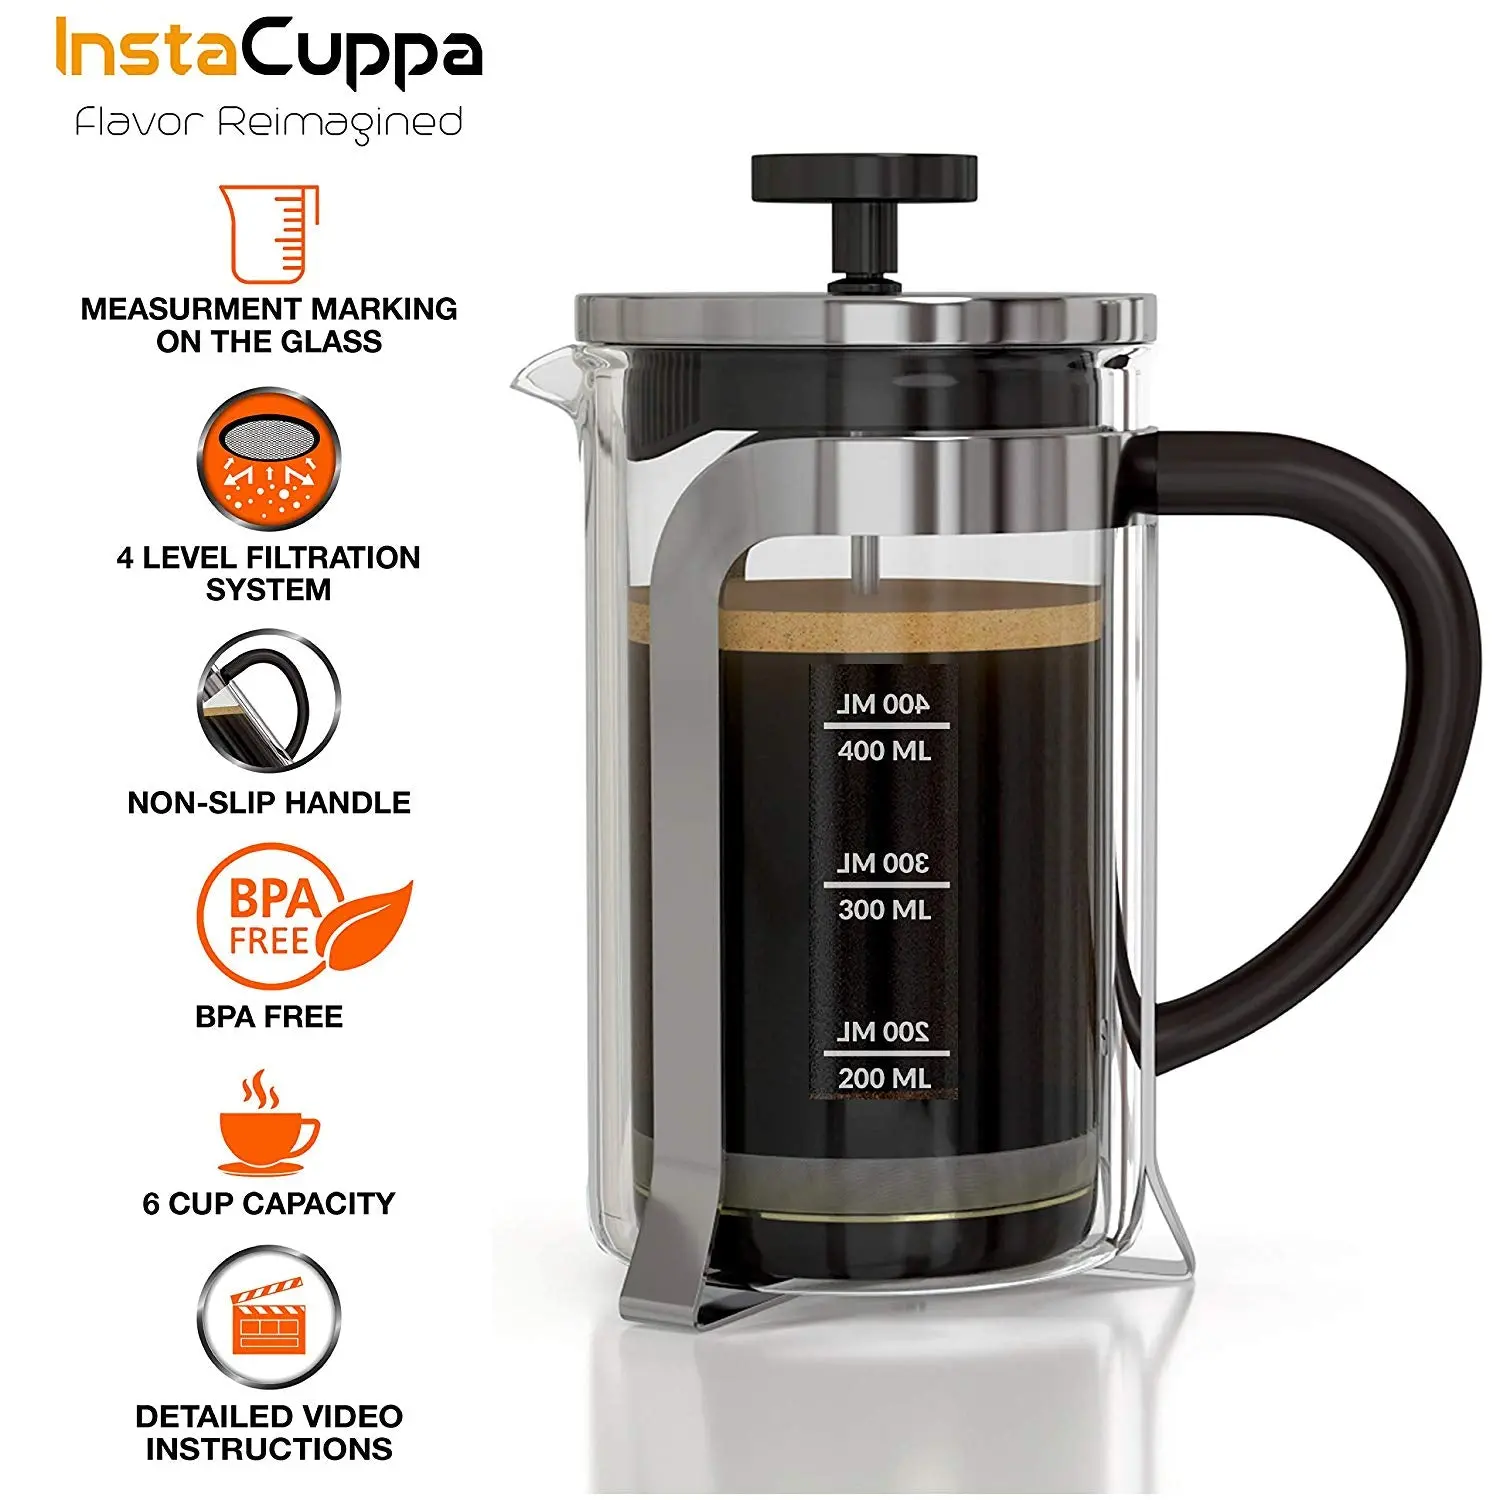








InstaCuppa French Press Coffee Maker with Smooth Plunger Mechanism, 4 Part Filtration, Measurement Markings
Drink Your Coffee In Style And Be A Trendsetter!
Measurement Markings
This french press comes with water level markings on its glass carafe.
These measurement markings will help you to use exact amounts of water and coffee powder to get your perfect brew each time!
Your expensive coffee powder will not be wasted, which means more savings to you.
4-Part Superior Filteration
4 part filtration system allows for a smooth coffee press mechanism and helps you to brew a perfect cup of coffee in just 4 minutes.
You will be amazed at how easy it is to make a great cup of coffee using our coffee plunger.
Just a gentle press is enough for this filter to work its magic.
Easy To Pour V-Spout
This coffee plunger comes with a V-spout and it offers the following benefits
- It helps you to pour your coffee effortlessly.
- It prevents your coffee from spilling while you pour.
Easy To Grip Handle
This coffee maker has a very easy to grip handle and helps you to use this french press effortlessly.
Also, this handle is heat resistant. No matter how hot your coffee is you will not feel a thing.
FREE Accessories Included
2 Extra Mesh Filters
This french press coffee maker also comes with 2 spare mesh filters.
These spare filters will last really long. No need to buy filter replacements for a long time.
Cleaning Brush
This coffee plunger comes with a cleaning brush add-on.
This cleaning brush has soft sponge-like bristles and will help you to clean your french press quickly and will not scratch your glass carafe.
Using this brush will keep your french press will looking brand new for a very long time!
Coffee Scoop
This french press coffee maker also comes with a small coffee scoop.
Multi-Purpose
Multi-Purpose - Coffee
Make your favorite coffee brews like
- Espresso.
- Americano.
- Cappuccino.
- Latte.
Multi-Purpose - Tea
Make your favorite tea brews like
- Green Tea.
- White Tea.
- Detox Tea.
- Any Loose Leaf Tea.
Multi-Purpose - Milk Frother
Use this coffee press as a milk frother and buttermilk maker.
Multi-Purpose - Fruit Squasher
You can also make fruit squashes like
- Watermelon Squash.
- Strawberry Squash.
- Grape Squash.
How To Use?
Step 1
Add your favorite coffee powder to your french press.
Note: Please use medium or filter grind coffee powder only.
Step 2
Pour boiling hot water into your carafe.
Step 3
Wait for 3 to 4 minutes then press until your plunger is at the bottom.
Step 4
Now serve this freshly brewed coffee into your mug.
Video Transcript
[0:00] Welcome Coffee Enthusiast. Today, let's master the art of using the three-in-one powder filter with your InstaCurper Espresso Coffee Maker. For a single aromatic cup of espresso, attach the one cup filter by turning it clockwise, add one scoop of your favourite fresh ground coffee to the filter. Tant the coffee grounds firmly, creating a perfect base for your espresso. Now, lock the filter by turning it anticlockwise, securing the grounds in place.
[0:30] Ready for the magic? Press the one cup button and watch as a single shot of espresso, ground with cream or fills your cup. For a bolder experience with a double shot, attach the two-cup filter to the pota filter. Add two generous scoops of coffee grounds, next, it's time to tamper the coffee grounds. This step is crucial for optimal water extraction while brewing.
[1:00] Lock the pota filter and press the two-cup button to start brewing. Behold, as two shots of espresso with velvety cream or fills your cup. To switch things up with easy-serve espresso pods, attach the one-cup filter. Insert your favourite easy-serve espresso pod into the filter for a hassle-free experience.
[1:30] Lock the pota filter securely and press one cup to brew. Watch as the rich aromatic coffee quarters your easy-serve espresso pods fill your favourite mug. You have mastered the versatile 3-in-1 pota filter with your insta-cupper espresso coffee maker. Enjoy your perfect cup every day. Brew it simple, brew it with insta-cupper.
Video Transcript
[0:00] Welcome to your step-by-step guide on how to brew the perfect espresso with your InstaCapa ExpressoMaker. First step by filling the water tank to its maximum capacity. Next, press the power button to turn on your InstaCapa ExpressoMaker. Now, attach the One Cup filter to the Porta filter by turning it clockwise. Add one scoop of your favorite ground coffee to the filter.
[0:30] Make sure to distribute the coffee evenly for a perfect glue. Tamp the coffee firmly to ensure a rich and full-bodied espresso. Now, attach the Porta filter to the espresso maker by locking it anticlockwise. For a single espresso, simply press the One Cup button. For a double espresso, attach the Two Cup filter InstaCapa.
[1:00] Add two scoops of ground coffee. Remember to tap the coffee firmly once again. Lock the Porta filter in place. Press the Two Cup button for a double espresso. And there you have it.
[1:30] With the InstaCapa ExpressoMaker, brewing the perfect espresso has never been easier. A delicious espresso with the perfect cream, all from the comfort of your own home. So, what are you waiting for? Get your InstaCapa ExpressoMaker today and start enjoying Barista Quality espresso at home.
Video Transcript
[0:00] Welcome to the complete user guide to InstaKappa espresso brewing and milk steaming. Begin by pressing the power button to turn on your InstaKappa espresso maker. As you press the power button, the InstaKappa espresso maker comes to life. Initiating a 30 second preheating phase. This crucial step ensures that your coffee is brewed at an optimal temperature, unlocking the full flavored potential of your coffee grounds. Keep an eye on the indicated light. Once it stops flashing, it's perfect time to start brewing your espresso.
[0:30] For steaming, press the steam button to prepare the machine to reach the optimal temperature. Keep an eye on the steaming light and patiently wait until it stops flashing. Once it stops flashing, position your milk jar and insert the steaming wand after 2 cm inside the milk. Turn the knob up to steaming icon to froth your milk. Once you get the perfect froth for your latte or cappuccino, turn off the knob.
[1:00] You'll notice that the 1 cup and 2 cup buttons become inactive after steaming. To unlock and start brewing again, simply tap the steam button. There you have it. Enjoy your perfect cup.
[1:30] Brew it right, brew it with InstaKappa.
Product Information
Product Information
Shipping & Returns
Shipping & Returns
Description
Drink Your Coffee In Style And Be A Trendsetter!
Measurement Markings
This french press comes with water level markings on its glass carafe.
These measurement markings will help you to use exact amounts of water and coffee powder to get your perfect brew each time!
Your expensive coffee powder will not be wasted, which means more savings to you.
4-Part Superior Filteration
4 part filtration system allows for a smooth coffee press mechanism and helps you to brew a perfect cup of coffee in just 4 minutes.
You will be amazed at how easy it is to make a great cup of coffee using our coffee plunger.
Just a gentle press is enough for this filter to work its magic.
Easy To Pour V-Spout
This coffee plunger comes with a V-spout and it offers the following benefits
- It helps you to pour your coffee effortlessly.
- It prevents your coffee from spilling while you pour.
Easy To Grip Handle
This coffee maker has a very easy to grip handle and helps you to use this french press effortlessly.
Also, this handle is heat resistant. No matter how hot your coffee is you will not feel a thing.
FREE Accessories Included
2 Extra Mesh Filters
This french press coffee maker also comes with 2 spare mesh filters.
These spare filters will last really long. No need to buy filter replacements for a long time.
Cleaning Brush
This coffee plunger comes with a cleaning brush add-on.
This cleaning brush has soft sponge-like bristles and will help you to clean your french press quickly and will not scratch your glass carafe.
Using this brush will keep your french press will looking brand new for a very long time!
Coffee Scoop
This french press coffee maker also comes with a small coffee scoop.
Multi-Purpose
Multi-Purpose - Coffee
Make your favorite coffee brews like
- Espresso.
- Americano.
- Cappuccino.
- Latte.
Multi-Purpose - Tea
Make your favorite tea brews like
- Green Tea.
- White Tea.
- Detox Tea.
- Any Loose Leaf Tea.
Multi-Purpose - Milk Frother
Use this coffee press as a milk frother and buttermilk maker.
Multi-Purpose - Fruit Squasher
You can also make fruit squashes like
- Watermelon Squash.
- Strawberry Squash.
- Grape Squash.
How To Use?
Step 1
Add your favorite coffee powder to your french press.
Note: Please use medium or filter grind coffee powder only.
Step 2
Pour boiling hot water into your carafe.
Step 3
Wait for 3 to 4 minutes then press until your plunger is at the bottom.
Step 4
Now serve this freshly brewed coffee into your mug.
Video Transcript
[0:00] Welcome Coffee Enthusiast. Today, let's master the art of using the three-in-one powder filter with your InstaCurper Espresso Coffee Maker. For a single aromatic cup of espresso, attach the one cup filter by turning it clockwise, add one scoop of your favourite fresh ground coffee to the filter. Tant the coffee grounds firmly, creating a perfect base for your espresso. Now, lock the filter by turning it anticlockwise, securing the grounds in place.
[0:30] Ready for the magic? Press the one cup button and watch as a single shot of espresso, ground with cream or fills your cup. For a bolder experience with a double shot, attach the two-cup filter to the pota filter. Add two generous scoops of coffee grounds, next, it's time to tamper the coffee grounds. This step is crucial for optimal water extraction while brewing.
[1:00] Lock the pota filter and press the two-cup button to start brewing. Behold, as two shots of espresso with velvety cream or fills your cup. To switch things up with easy-serve espresso pods, attach the one-cup filter. Insert your favourite easy-serve espresso pod into the filter for a hassle-free experience.
[1:30] Lock the pota filter securely and press one cup to brew. Watch as the rich aromatic coffee quarters your easy-serve espresso pods fill your favourite mug. You have mastered the versatile 3-in-1 pota filter with your insta-cupper espresso coffee maker. Enjoy your perfect cup every day. Brew it simple, brew it with insta-cupper.
Video Transcript
[0:00] Welcome to your step-by-step guide on how to brew the perfect espresso with your InstaCapa ExpressoMaker. First step by filling the water tank to its maximum capacity. Next, press the power button to turn on your InstaCapa ExpressoMaker. Now, attach the One Cup filter to the Porta filter by turning it clockwise. Add one scoop of your favorite ground coffee to the filter.
[0:30] Make sure to distribute the coffee evenly for a perfect glue. Tamp the coffee firmly to ensure a rich and full-bodied espresso. Now, attach the Porta filter to the espresso maker by locking it anticlockwise. For a single espresso, simply press the One Cup button. For a double espresso, attach the Two Cup filter InstaCapa.
[1:00] Add two scoops of ground coffee. Remember to tap the coffee firmly once again. Lock the Porta filter in place. Press the Two Cup button for a double espresso. And there you have it.
[1:30] With the InstaCapa ExpressoMaker, brewing the perfect espresso has never been easier. A delicious espresso with the perfect cream, all from the comfort of your own home. So, what are you waiting for? Get your InstaCapa ExpressoMaker today and start enjoying Barista Quality espresso at home.
Video Transcript
[0:00] Welcome to the complete user guide to InstaKappa espresso brewing and milk steaming. Begin by pressing the power button to turn on your InstaKappa espresso maker. As you press the power button, the InstaKappa espresso maker comes to life. Initiating a 30 second preheating phase. This crucial step ensures that your coffee is brewed at an optimal temperature, unlocking the full flavored potential of your coffee grounds. Keep an eye on the indicated light. Once it stops flashing, it's perfect time to start brewing your espresso.
[0:30] For steaming, press the steam button to prepare the machine to reach the optimal temperature. Keep an eye on the steaming light and patiently wait until it stops flashing. Once it stops flashing, position your milk jar and insert the steaming wand after 2 cm inside the milk. Turn the knob up to steaming icon to froth your milk. Once you get the perfect froth for your latte or cappuccino, turn off the knob.
[1:00] You'll notice that the 1 cup and 2 cup buttons become inactive after steaming. To unlock and start brewing again, simply tap the steam button. There you have it. Enjoy your perfect cup.
[1:30] Brew it right, brew it with InstaKappa.